Greetings loyal readers! Hope all of you had an enjoyable holiday. I have found the past few days to be restful, stressful, wonderful and chocolate-filled, so three out of four isn't bad! I've finally found my way back into my craft space, so here's a tag I made using stamps from 100 Proof Press:
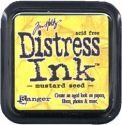
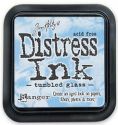
I made the background with the Profit and Loss Sheet stamp, which I stamped over a trellis stencil for a subtle pattern. I smeared on some Distress Ink in shades of Tumbled Glass and Mustard Seed, along with some Colorbox Fresh Green ink.
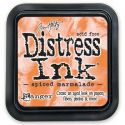
Next I inked up the Tallest Tree Silhouette stamp with Ranger Jet Black archival ink. Before stamping it, I wiped off the ink in some circular smudge shapes so that the tree would stamp with some blank "holes." Once I stamped the image, I went back in with Distress Paint (Picked Raspberry, Spiced Marmalade and Worn Lipstick) and dabbed it on some of my tree's holes. I dripped water down the paint while it was still wet for the drizzled effect.
I finished it off with a "Scatter Art" sentiment at the bottom and some yarn at the top.
Thanks for stopping by and I wish all of you the happiest of beginnings for 2015!
▼
Tuesday, December 30, 2014
Sunday, December 14, 2014
Tutorials: Upcycled Shoe Memo Holders
The theme this week at the Simon Says Stamp Monday Challenge Blog is ANYTHING GOES! Since nothing was off limits, I decided to re-purpose these adorable little cardboard feet into some handy-dandy memo/photo holders.
To make these, I started with some cardboard shoe/feet forms that some baby socks came on. The ones I used were Converse brand. All the forms I found were hollow and were either cardboard or plastic and you can find a box of them for a reasonable price at places like Ross or TJ Maxx.
Coat the shoes with Gesso or white acrylic paint. If they're already white plastic, you get to skip this step. Once the Gesso dries, cover your shoes with Washi tape. Since Washi isn't known for sticking permanently to surfaces like this, I used a glue stick to tape down my Washi, especially in the places where it overlapped.
Once your shoes are covered with Washi, you can add some Distress Paint or acrylic paint to give it some opaque spots of color. Here I've used some yellow paint to highlight certain areas:
Next you can add ink (I applied mine with sponges) to give your shoes some additional shades of color. I used brown, black and orange ink.
The next step is to attach the wire that will poke out the top of your shoes to hold your memos. I realized that I would have to anchor the wire to something stable on the inside of my shoe, so I decided to go with corks. Using a needle, I poked a hole through each cork.
Then I used the same needle to poke a hole through the top of the shoe. Thread a piece of wire through the cork and make a curl in the bottom so it won't pull through your cork. Put some hot glue on the top of your cork, then pull the wire through the hole in your shoe so that the cork glues to the inside of the shoe with the long part of the wire poking out the top.
Using pliers, twirl the long wire down into a squiggly curl (this will form the wire curl that will hold your memos or photos).
Once the wire part is done, you can finish off your shoes by adding other embellishments like flowers or words, which I adhered with hot glue.
Your shoes are now ready to hold any little scraps your heart desires! These would be so fun to personalize and would also make great place card holders for a dinner party (for those of you admirable people out there who cook)!
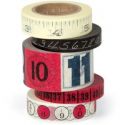
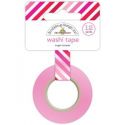
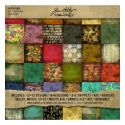
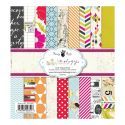
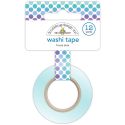
Washi is truly a wonderful material. Here are the tapes I used, along with other supplies that you can get at Simon Says Stamp:

With a theme of Anything Goes, there's no reason NOT to upload your creations to the Simon Says Stamp Monday Challenge Blog for your chance to win a $50 voucher to the Simon Says Stamp store.
To make these, I started with some cardboard shoe/feet forms that some baby socks came on. The ones I used were Converse brand. All the forms I found were hollow and were either cardboard or plastic and you can find a box of them for a reasonable price at places like Ross or TJ Maxx.
Coat the shoes with Gesso or white acrylic paint. If they're already white plastic, you get to skip this step. Once the Gesso dries, cover your shoes with Washi tape. Since Washi isn't known for sticking permanently to surfaces like this, I used a glue stick to tape down my Washi, especially in the places where it overlapped.
Once your shoes are covered with Washi, you can add some Distress Paint or acrylic paint to give it some opaque spots of color. Here I've used some yellow paint to highlight certain areas:
Next you can add ink (I applied mine with sponges) to give your shoes some additional shades of color. I used brown, black and orange ink.
The next step is to attach the wire that will poke out the top of your shoes to hold your memos. I realized that I would have to anchor the wire to something stable on the inside of my shoe, so I decided to go with corks. Using a needle, I poked a hole through each cork.
Then I used the same needle to poke a hole through the top of the shoe. Thread a piece of wire through the cork and make a curl in the bottom so it won't pull through your cork. Put some hot glue on the top of your cork, then pull the wire through the hole in your shoe so that the cork glues to the inside of the shoe with the long part of the wire poking out the top.
Using pliers, twirl the long wire down into a squiggly curl (this will form the wire curl that will hold your memos or photos).
Once the wire part is done, you can finish off your shoes by adding other embellishments like flowers or words, which I adhered with hot glue.
Your shoes are now ready to hold any little scraps your heart desires! These would be so fun to personalize and would also make great place card holders for a dinner party (for those of you admirable people out there who cook)!
Washi is truly a wonderful material. Here are the tapes I used, along with other supplies that you can get at Simon Says Stamp:

With a theme of Anything Goes, there's no reason NOT to upload your creations to the Simon Says Stamp Monday Challenge Blog for your chance to win a $50 voucher to the Simon Says Stamp store.
Sunday, December 7, 2014
My Other Creations: Wonderful Whimsical Cart
"Transportation" is our intriguing theme this week over at the Simon Says Monday Challenge Blog. Being somewhat of a Jello mold hoarder, I decided to use one as my base for this wacky whimsical cart-a-ma-bob thing.
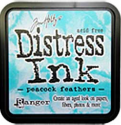
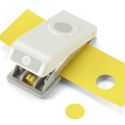
I scrubbed the Jello mold with the Tim Holtz sanding block to rough it up (please don't hate me, Jello mold purists) then gave it a coat of Gesso. I added some acrylic paint, then dabbed on Distress Paint in Peacock Feathers, Picket Fence and Tumbled Glass. I decided it needed some more oomph, so I stamped some text (Hero Arts "Word Pops" set), then punched circles out of the text. I inked them up, added some embroidery floss around the edges, then stuck them to my cart base.
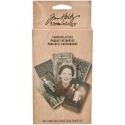
Around the top, I wrapped some silver Tim Holtz Tinsel Twine and yarn. I also utilized his Found Relatives to create the occupants for my cart. I covered their dresses with scraps of Washi and gave them some traveling hats.
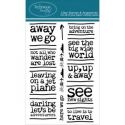
I added some bottle cap wheels and an umbrella made from scraps of fabric. I finished it off with a great little quote using the "Away We Go" stamp set. Looks to me like they're ready for adventure!
Here are some of the supplies I used, which you can find at Simon Says Stamp:

I really enjoyed this week's transportation theme and hope you'll show us what you come up with. Upload your projects to the Simon Says Stamp Monday Challenge Blog and you're automatically entered in the drawing to win a $50 voucher to Simon Says Stamp!
I scrubbed the Jello mold with the Tim Holtz sanding block to rough it up (please don't hate me, Jello mold purists) then gave it a coat of Gesso. I added some acrylic paint, then dabbed on Distress Paint in Peacock Feathers, Picket Fence and Tumbled Glass. I decided it needed some more oomph, so I stamped some text (Hero Arts "Word Pops" set), then punched circles out of the text. I inked them up, added some embroidery floss around the edges, then stuck them to my cart base.
Around the top, I wrapped some silver Tim Holtz Tinsel Twine and yarn. I also utilized his Found Relatives to create the occupants for my cart. I covered their dresses with scraps of Washi and gave them some traveling hats.
I added some bottle cap wheels and an umbrella made from scraps of fabric. I finished it off with a great little quote using the "Away We Go" stamp set. Looks to me like they're ready for adventure!
Here are some of the supplies I used, which you can find at Simon Says Stamp:

I really enjoyed this week's transportation theme and hope you'll show us what you come up with. Upload your projects to the Simon Says Stamp Monday Challenge Blog and you're automatically entered in the drawing to win a $50 voucher to Simon Says Stamp!


