Call it the February Blahs (luckily we are almost into March), but I've been reaching for my brights and pastels in search of some sort of OOMPH! POW! COLOR! Not that I don't enjoy looking at my brown lawn, the smoggy sky and dead flowerbeds, but come on! I need some signs of Spring! Since I'm not seeing a lot of color on the landscape quite yet, I decided to create my own springy vibe with this colorful card using stamps from 100 Proof Press:
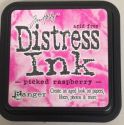
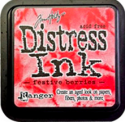
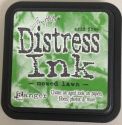
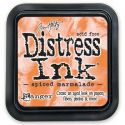
I started out by dabbing different colors of Distress Ink onto my stamp and stamping the image (called Large Flower Face Girl) onto white watercolor paper.
I smeared on some more Distress Ink in coordinating colors to the areas I'd stamped, then I stamped the same image onto a Post-It note and cut around the edges. I stuck it over my image as a mask. I love using Post-Its for masking!
Now, with my image safely covered, I stamped patterns around the girl using Screen Texture and Bunch O' Buttons.
I removed the mask and reached for my watercolors! I painted in some of the buttons and some parts of the girl, toned down the red tones with some lighter pinks and let the watercolors drip down the card in various areas. Once it was dry, I added some thread in squiggle shapes and some fabric scraps to frame the image. I also stamped on some wonky circle-dots in different colors, which actually came from a Bullet Holes stamp.
I inked around the edges with brown ink and this little lady was ready for the flower garden! Cheers to the anticipation of seeing little buds start to bloom!
▼
Saturday, February 28, 2015
Sunday, February 22, 2015
My Other Creations: Fabulous Folio Interior
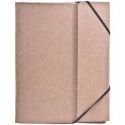
Oh how I love an "Anything Goes" theme, which is what's happening this week over at the Simon Says Stamp Monday Challenge Blog! Since there were no rules and limitless freedom, I decided to make a rule for myself (counter-productive, I know). That rule was to finish the inside of one of my favorite folios. I always love doing the outside, but I admit to dropping the ball when it comes to making the inside spiffy, too. But not this time! I did it all and here it is:
LOVE these new Tim Holtz Photobooth strips! I added some words to the front and some washi and paint to the background. I mixed lots of different Tim Holtz paper, but mainly used the Wallflower collection.
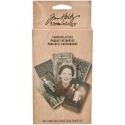
And you know I love the Found Relatives cards, too, but I didn't realize I loved the backs of the cards as well! For the top flap, I used the back of a Found Relatives card and stuck the word, "Possibility" in the center, then decorated with more stenciling and paint.
For the bottom flap, I used the front side of a Found Relatives card and again added some stenciling and inking, as well as a word or two.
For the outside of the bottom flap, I went with Tim's classic clocks and kicked them up with some color.
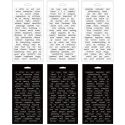
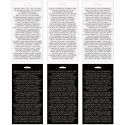
All the fun word stickers you're seeing are from Tim's new Big Chat and Small Talk lines. Here it is with all of its inside flaps and panels exposed.
The products I used on my folio project are available at Simon Says Stamp.

So with no rules, where will your muse take you this week? Upload your masterpieces to the Simon Says Stamp Monday Challenge Blog and not only will you inspire and edify the rest of us, but you'll be entered to win a $50 voucher to Simon Says Stamp!
LOVE these new Tim Holtz Photobooth strips! I added some words to the front and some washi and paint to the background. I mixed lots of different Tim Holtz paper, but mainly used the Wallflower collection.
And you know I love the Found Relatives cards, too, but I didn't realize I loved the backs of the cards as well! For the top flap, I used the back of a Found Relatives card and stuck the word, "Possibility" in the center, then decorated with more stenciling and paint.
For the bottom flap, I used the front side of a Found Relatives card and again added some stenciling and inking, as well as a word or two.
For the outside of the bottom flap, I went with Tim's classic clocks and kicked them up with some color.
All the fun word stickers you're seeing are from Tim's new Big Chat and Small Talk lines. Here it is with all of its inside flaps and panels exposed.
The products I used on my folio project are available at Simon Says Stamp.

So with no rules, where will your muse take you this week? Upload your masterpieces to the Simon Says Stamp Monday Challenge Blog and not only will you inspire and edify the rest of us, but you'll be entered to win a $50 voucher to Simon Says Stamp!
Saturday, February 21, 2015
My Cards and Tags: Hairdo Re-do
I always get a bit antsy during January and February when the weather's gloomy and all the holidays are over. I yearn for some color and spontaneity! So I thought to myself, why not dye my hair blue? Five seconds later, I remembered my work's dress code policy and the fact that I'm way past my prime for sporting blue hair. So I decided to give blue hair to one of my stamp girls instead. I call this little project, "Hairdo Re-do."
All the stamps used on this card are from 100 Proof Press. The girl stamp, called Flowers for Hair, is stunning. I stamped her on flesh-colored cardstock, then fussy-cut around her and added pink chalk to her cheeks. I trimmed down her stamped hair and glued yarn strands to her head instead, which totally changed the look of the image. I also made a dress for her.
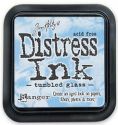
For the card's background, I started with white cardstock and heat-embossed two stamped images on top of each other (Balance Sheet in black and Large Handwriting, placed vertically, in blue). On top of that, I stamped Mode de Paris Buttons in green and smeared them with Tumbled Glass Distress Ink.
I followed up with more inking. I smeared Salty Ocean Distress Ink down the vertical handwriting lines and smudged some Cracked Pistachio and Tumbled Glass Distress Ink on the background, along with some Fresh Green Colorbox ink.
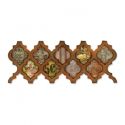
I topped it off with this Papertrey Ink Quatrefoil cover plate die, which I cut a few sections out of and added ink to. I also glued some of the cut-out pieces back in.
I nestled my blue-haired friend behind the cover plate die, added the Beautiful You sentiment and was done! I enjoyed this little project and it did beat back that feeling of February Blah...until I have to scrape my frosty car windows again in the morning!
Sunday, February 15, 2015
My Other Creations: Beachy Bread Tin
This week's Simon Says Stamp Monday Challenge is, "Piece of Paradise." Paradise, for me, is the beach! Give me my fam, a good book and a little slice of sand next to the water and I am in heaven! But where I live, coasts are a little hard to come by. Even so, I tried to bring the beach into my crafty space by converting this bread pan into a beachy tin.
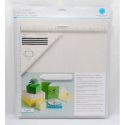
This little bread tin was a rusty old relic I found at the local thrift store for 50 cents. I started by sanding the tin so paint would adhere to it, then I painted it with Gesso (I Gesso everything, especially if I'm not sure what my next step is)! When that dried, I covered it with some patterned paper that had a beachy wood design. I used a scoring board to make the fold lines nice and tight. Here it is after I've covered one of the sides.
I covered the whole thing with paper, then added a beachy garland that includes starfish, which I truly do think are "Beautiful creatures."
The garland was a lot of fun to make. After I cut out the pennant flags, I used the leftover "frame" parts on my garland, too.
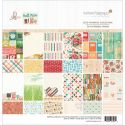
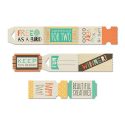
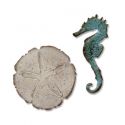
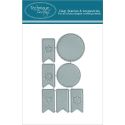
Here are the supplies I used to make my project, which you can find at Simon Says Stamp:

I can't wait to catch a glimpse of your pieces of paradise! Upload your creations to the Simon Says Stamp Monday Challenge Blog for your chance to win a $50 gift voucher to the Simon Says Stamp store. Sounds like a bit of paradise to me!
This little bread tin was a rusty old relic I found at the local thrift store for 50 cents. I started by sanding the tin so paint would adhere to it, then I painted it with Gesso (I Gesso everything, especially if I'm not sure what my next step is)! When that dried, I covered it with some patterned paper that had a beachy wood design. I used a scoring board to make the fold lines nice and tight. Here it is after I've covered one of the sides.
I covered the whole thing with paper, then added a beachy garland that includes starfish, which I truly do think are "Beautiful creatures."
The garland was a lot of fun to make. After I cut out the pennant flags, I used the leftover "frame" parts on my garland, too.
Here are the supplies I used to make my project, which you can find at Simon Says Stamp:

I can't wait to catch a glimpse of your pieces of paradise! Upload your creations to the Simon Says Stamp Monday Challenge Blog for your chance to win a $50 gift voucher to the Simon Says Stamp store. Sounds like a bit of paradise to me!


