What personifies summer for you? That's the theme for this week's Simon Says Stamp Monday Challenge. There were so many things I could think of for this magical time of year, but it all boiled down to road trips to the beach! Living in a land-locked desert state, however, I don't get there nearly as often as I'd like to. I made these little beach boxes so I could take the beach with me wherever I go.
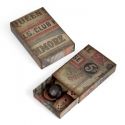
I started by using the Tim Holtz matchbox die to cut out a box, and I assembled a few items to go inside. I didn't have any sand handy, so I used brown sugar and put it in a bag to test how it would fit in the box once it was done.
The cloud paper is the lid of the matchbox, which the base normally slides into. But instead of gluing the lid together, I left it open and glued it to the back of my base box so it would work as a closing flap instead of a slide-on matchbox lid. I also tested my "sand" for a good fit and added the "H2O means water" sentiment, which I typed in Word and cut out.
I flipped the box over and decorated the front with a beach house that I stamped, watercolored, and adhered to the lid. I also added a small piece of adhesive to the box's flap/lid so it would stay shut.
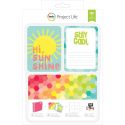
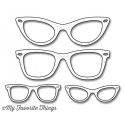
When you open the box and flip it horizontally, you can set your beach up and it's ready to go! I poured my "sand" out of the back, then nestled everything in and propped it all against the flap, which you can fold up as a nice backdrop. The surfboard and beach ball came from Project Life cards and a paper pack. I made the sunglasses using My Favorite Things' Geek is Chic die set and the book is made from Tim Holtz's Halloween ticket stamp.
Here are the supplies I used, which you can find at Simon Says Stamp:
I can't wait to see what Summer means to you! Upload your masterpieces to the Simon Says Stamp Monday Challenge Blog and you'll be entered to win a $50 voucher to the Simon Says Stamp store!
▼
Sunday, June 28, 2015
Sunday, June 21, 2015
My Other Creations: Fly Collage
The challenge this week over at the Simon Says Stamp Monday Challenge blog is to use mist and stamps. I wasn't sure where I was going when I started my project, but here's where I ended up:
I started my collage with a piece of Strathmore's Mixed Media paper. I've got to give props to this paper, which holds up very well to lots of water and spritzing!
Using Simon Says Stamp's Scribble flowers stamp set (a favorite of mine), and Ranger Jet Black Archival ink, I made some circles on my paper.
Bring on the misting! I sprayed only two colors on this: one spritz of Dylusions Fresh Lime and two spritzes of Dylusions Bubblegum Pink spray ink. I grabbed a spray bottle and sprayed water in horizontal swipes across my splotches of spritzed ink. The water made the colors spread and blend and create totally new shades. The yellow from the green made some cool shades of orange and peach when it hit the pink.
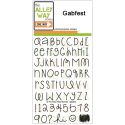
I wanted flowers on my piece, so I punched several Hydrangeas out of white cardstock using Martha Stewart's large Hydrangea punch. I wanted them to have a pattern, so I inked up the entire Alleyway Gabfest alphabet (without removing it from its acetate backing) and stamped it a few times over my laid-out flowers.
I sprayed my flowers with Dylusions Fresh Lime, Bubblegum Pink and Lemon Zest and added several spritzes of water so the colors would blend.
When my flowers dried, I outlined them with a fine-point Sharpie pen, glued them to my background and curled the petals up just a bit.
I thought it needed a hint of another color, so I drew some small Sharpie circles and inked them with Peacock Feathers, cut them out, and added them to my background. I also smudged just a bit of Peacock Feathers onto my background. But what else did it need? I turned to my husband, whose opinion I always ask when I'm crafting and get stuck. He usually says macho things like, "Do some rivets," or "Mod Podge it onto a shovel," but this time he told me to add a plane. I rolled my eyes and was ready to discard that suggestion (bless him), but then I thought a little paper airplane would be perfect! Thanks to my brother and my dad, I knew how to fold one. I made a mini version and stamped the word, "Fly," on it. I attached it to my background using black Prima Wire Thread in a coiled spring-shape so it's sproinging off the page.
I have to say that this collage was a lot of fun and I'm proud of myself for leaving a lot of the background white. I know! Amazing, huh! I usually feel the need to have every inch colored, but I forced myself to leave some white this time. I used a thick black Sharpie to color a border around my page and I was done!
Here are the supplies I used which you can get at Simon Says Stamp:
So what magical tricks can you work with stamps and mist this week? Your pieces always inspire me and make me think! Upload your creation to the Simon Says Stamp Monday Challenge Blog for your chance to win $50 to the Simon Says Stamp store.
Tuesday, June 16, 2015
My Other Creations: Gardening Notebook
So I have this amazing friend that has mastered two skills that I have yet to learn: cooking and gardening. The baked chocolately goodies this woman whips up are to die for and her yard is filled with quaint little gates, flowerbeds, paths, and a wheelbarrow bursting with blooms. I admire her talents and since her birthday was coming up, I decided to make her a notebook that she could use for recipes, gardening secrets, favorite books, or anything else that came to mind.
I started with a piece of paper from the Paper Studio's Country Road pack. The Paper Studio is a brand you can get at Hobby Lobby. Using acrylic paint and the Prima Honeycomb stencil, I made some dots in the background. I also smeared on some Distress Ink in Peacock Feathers, Twisted Citron, and Cracked Pistachio. Then I used Papertrey Ink's Quatrefoil Die to cut out the lattice work. I snipped the lattice down and cut panels to go inside of the lattice with different pieces of patterned paper.
You know I love this girl stamp! Called, "Sunshine Girl," you can find it at the Paperbag Studios. I stamped her onto flesh-colored paper, then colored her in with a black Sharpie where the stamping wasn't bold enough. Then I fussy-cut her out, cut out a patterned paper headband and added some smudges of ink to it.
I made a dress for my girl, then glued her onto the top of my page and added some flowers to her headband using Martha Stewart's small Hydrangea punch. I added some pink chalk to her cheeks and used a Tim Holtz stamp (Life's Possibilities) to add some numbers to her dress. I started in on my sentiment using Prima Sunrise Sunset paper, Ranger Jet Black Archival Ink and Studio G alphabet stamps. I wanted to say something that really reflected how my friend makes the world better, so that's where the sentiment came from.
Using the We R Memory Keepers journal kit, I glued my page to the chipboard cover provided. I found a cupcake sticker, which I added to my girl to reflect my friend's baking abilities. I added patterned paper to the front and back of the chipboard covers and made tabs to stick to the divider pages. I bound it together with the Cinch machine and wah-la! My notebook gift was done!
I always love a good crafting adventure, but there's something that elevates it to another level when you're making something for someone else. It feels good to share the love through paper and stamps, you know? And it also makes me feel less guilty for buying so many supplies! So share on, share on and thanks to everyone out there who makes life more beautiful for the rest of us.
Sunday, June 14, 2015
My Cards and Tags: Cupcake Tag
This week's Simon Says Stamp Monday Challenge is all about paste! I had cupcakes on the brain, so I decided to use modeling paste to create some faux frosting for the cupcake on my tag:
To make my "frosting," I stirred a dab of modeling paste with some Spun Sugar Distress Paint (about a 3 to 1 paste to paint ratio). It made the paste slightly more runny and it was easy to spread onto my die-cut shape with a plastic knife. When it was dry, I used a sponge to smear on some Worn Lipstick Distress Ink to give it some shading.
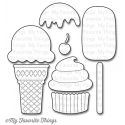
I added some lime green enamel dots to replicate sprinkles and topped it with a flower. I used foam dots to pop it out from my tag just a bit. You also may note that I used the ice cream cone scoop die for my cupcake top instead of the cupcake die. I liked the different look that it gave it.
Here are the products I used to make my tag, which you can find at Simon Says Stamp:
I'm anxious to see the many ways you interpret our theme and use paste in your creations. Upload your work to the Simon Says Stamp Monday Challenge Blog and you'll not only inspire us, but will be automatically entered into the drawing for a $50 gift voucher to the Simon Says Stamp Store!