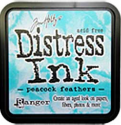
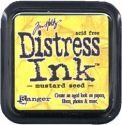
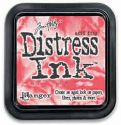
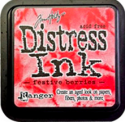
I am quite a color-holic, so when I learned that this week's Simon Says Stamp Monday Challenge theme was, "A Trio of Color," I really had to stave off panic mode as I decided to limit myself to just three colors. Peacock Feathers, Mustard Yellow and Worn Lipstick were the three I decided to go with and I used them to help dress up some, "Muse Jars."
Am I the only one that needs a weekend to hit in the middle of a Wednesday? Maybe that's part of what prompted this idea. Sometimes the weeks are too long and the days are even longer! I really do wish you could have a pinch of pep lying around or an ounce of oomph when you feel wiped out. And there have been plenty of times when I've needed a measure of muse!
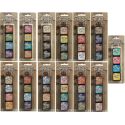
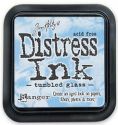
These began as salt shakers and my first step was to make some crinkle ribbon for them. Just as a review on how to make crinkle ribbon, you can start by dabbing some Distress Ink onto a nonstick craft mat. Here I'm using Mustard Seed and Peacock Feathers.
Spritz a small amount of water onto your ink and add your ribbon into the mix.
If you don't want your hands stained with ink for awhile, wear gloves or use a tool (Popsicle stick, bamboo skewer, etc.) to stir, squish, swirl, and mash your ribbon around in the watery ink until the ribbon mops it all up.
To get it to crinkle, you have a couple of options. If you planned ahead (round of applause), you can smoosh it down into the corner of a plastic bag. Tie or clip the bag shut, then let it dry overnight.
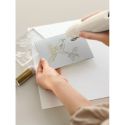
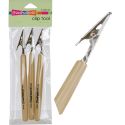
If you didn't plan ahead (like someone who might be typing this post right now), you'll have to wad it up, hold it in place with something (I used these handy alligator clippy-tool thingies), then shoot it with a heat gun until it dries. When it does, your ribbon should be nice and crinkly!
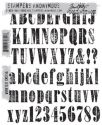
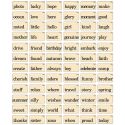
I filled my jars with random bits of glitter, sequins and beads, then added labels held on by little pins. I stamped the words with alphabet stamps and my little jars were done.
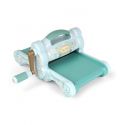
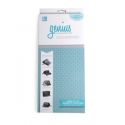
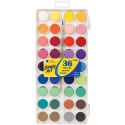
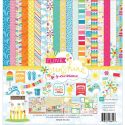
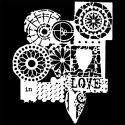
Here are the supplies I used, which you can find at Simon Says Stamp:
Can't wait to see how you interpret our Trio of Color challenge! Upload your creations to the Simon Says Stamp Monday Challenge Blog and you'll have a chance to win the $50 gift voucher to Simon Says Stamp!
▼
Sunday, August 30, 2015
Sunday, August 23, 2015
My Other Creations: Ticket, please!
I have to say that I love so many things associated with tickets: movies, amusement parks, concerts, contests, carnivals, free food, etc. But the two not-so-lovable ticket connections I thought of were speeding tickets and wait-in-line-forever tickets. Not that I'm a pessimist, but when I learned that this week's Simon Says Stamp Monday Challenge Blog theme was, "Ticket, please!" I made this piece in honor of all those times we have to wait with a little ticket in our hand for our number to be called. I was tempted to be a bit cheeky and title this piece, "Ode to JoAnn's," but in their defense, my local branch has recently brought their A game to the cut counter, so maybe those lines are a thing of the past (fingers crossed).
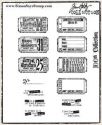
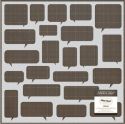
It may be hard to tell the size on this in the pic, but it's about 7" by 12", so it's good-sized. I started with the background. I stuck a bunch of Tim Holtz ticket stamps to a large acrylic block, inked them up with Ranger Jet Black Archival, then stamped them over a 12x12 speech bubble stencil (here's a tutorial I did last year on stamping over stencils if you've never given it a whirl) onto white mixed media paper. Once the black ink dried, I used watercolors to paint inside the speech bubbles.
The next step was to add some color to the background by sponging Distress Ink through some stencils, then smudging more ink here and there.
The star of our show is one of Tim Holtz's fashion gals. I wanted her to be bigger than the stamp size, so I stamped her on a piece of paper then enlarged it on a copy machine by almost 200%. I do this quite often with stamps when I need them to be a different size than the original. Then I put my copy on a light box (a window with sun shining through it works well, too), then put a piece of polka dot paper on top and traced/guessed where the lines of her dress would go. I fussy-cut the dress and put it on my girl.
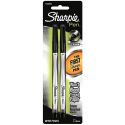
I used a black Sharpie to add lines to the inside and outside of the dress, and to color in the photocopy where it wasn't dark enough. I colored my girl's skin with Spectrum Noir markers. I glued down her dress, cut out my girl and attached her to my page. I stuck a real life JoAnn's cut counter waiting ticket in her arm.
I added the sentiment and wah-lah! My ticket collage was complete!
These are the supplies I used from Simon Says Stamp:
This is such a fun and versatile theme and I can't wait to see where you go with it! Be sure to upload your masterpieces to the Simon Says Stamp Monday Challenge Blog for your chance to win a $50 voucher to the Simon Says Stamp Store!
Sunday, August 16, 2015
My Other Creations: Grater Memo Board
Today's Simon Says Stamp Monday Challenge theme is, "Citrus with a Twist." The first thing I saw in my mind's eye was my talented chef of a mother grating all sorts of lemons and limes to add zest to...whatever it is you add lemon and lime zest to. And so I decided to pay homage to her by converting an old grater into a memo board.
The flowers are magnets so I can attach notes, quotes, photos or reminders to my memo board. Here's how it looks with a note attached:
I thoroughly enjoyed making this project and taking my twist on citrus! Here are the supplies I used that you can find at Simon Says Stamp:
So how will you give citrus a twist this week? Can't wait to be inspired by your ideas! Upload your creations to the Simon Says Stamp Monday Challenge Blog for a chance to win a $50 voucher to the Simon Says Stamp store!
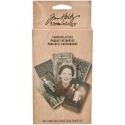
You've seen this girl before, I'm sure, as she's my favorite of Tim Holtz's Found Relatives to spruce up. I set her against a backdrop of distinguished gentlemen to make her stand out and remind myself to be my best and truest self no matter who's looking on. The label letters and flash card are also from Tim. I covered up the grating slices with my image so as to not zest my fingers off when using this board!
The flowers are magnets so I can attach notes, quotes, photos or reminders to my memo board. Here's how it looks with a note attached:
I thoroughly enjoyed making this project and taking my twist on citrus! Here are the supplies I used that you can find at Simon Says Stamp:
So how will you give citrus a twist this week? Can't wait to be inspired by your ideas! Upload your creations to the Simon Says Stamp Monday Challenge Blog for a chance to win a $50 voucher to the Simon Says Stamp store!