"Show Us Your Metal" is this week's theme over at the Simon Says Stamp Monday Challenge Blog. It was the perfect excuse to play with paint and some old keys. I envisioned the type of crazy key ring a muse or a modern-day fairy might carry around and this is the result:
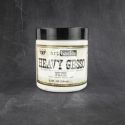
To make the colorful keys, I started by sanding the surface of some old keys I had in my stash, then covered them in heavy white Gesso.
Once the Gesso dried, I smudged and smeared on various shades of Dina Wakley acrylic paint, which you know I'm highly addicted to!
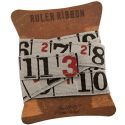
To give them back their weathered look, I sponged on some StazOn Timber Brown ink. When they were done, I adhered word strips to them.
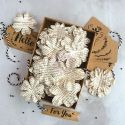
Another favorite element is the colorful dangly flower-wad thing I created (for lack of a better term). That started out as a Prima flower, which I colored with Distress Ink.
I folded up the colored flower, punched a hole in it, inserted an eyelet and had another fun element for my key ring.
The best part about this key ring is that it has absolutely nothing realistically useful on it for opening a door. I would expect nothing less if it truly were owned by a mythical muse or modern-day fairy! Here are some more detailed pics where I spread the charms out a bit.
I love using the letter B on my projects because it reminds me to "Be __________" (fill in the blank with some inspiring word). In this context, letter B always seems like a strong action letter. Be bold! Be brave! Be you!
And if you look really closely in the upper left corner of the picture, you can see a little scrap of floral fabric! Ha! Had to get my fabric fix in somehow!
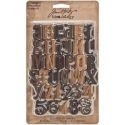
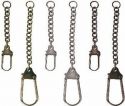
I have to say that I thoroughly and totally enjoyed this project and had a hoot making it! Here are the supplies I used from Simon Says Stamp (maybe I should've called it the Kitchen Sink key ring because I feel like I threw in everything but!):
How will you show us your metal this week? Can't wait to see what you create! Upload your metallic masterpieces to the Simon Says Stamp Monday Challenge Blog for your chance to inspire the rest of us AND be entered for the $50 voucher to Simon Says Stamp!
▼
Monday, April 25, 2016
Saturday, April 23, 2016
My Cards and Tags: Reverse Confetti April SFYTT
You know I love me some Reverse Confetti, so I'm playing along with their April SFYTT (Sketch For You to Try) challenge. Here's my card, which uses Reverse Confetti's Swirlies die, Thankful Pretty Panels die, and a stencil I made with the Fresh and Fruity die.
I started by making the background with a stencil I created from the leaves of the Fresh and Fruity die set. I outlined the shapes with a pink colored pencil and inked inside the leaf shapes with a little bit of Spun Sugar Distress Ink. Next I added a fabric scrap background, then cut and inked up the swirlies with some more Spun Sugar Distress Ink. I cut the Thankful sentiment with black cardstock and added it on top. I added some flowers that I had in my stash and smudged Peacock Feathers Distress Ink around the edge and finished it off with a Sharpie outline.
LOVED this sketch and had fun creating this one. Thanks, Reverse Confetti, for the inspiring sketch!
Thursday, April 21, 2016
My Cards and Tags: Simon Says Stamp: My Favorite Release
Oh how I love new product releases from Simon Says Stamp! Today marks the release of the "My Favorite" collection and it is packed full of wonderful whimsical goodies! Especially amusing (and probably therapeutic) are these watercolor note cards that you can color yourself. Here's how one of my cards turned out:
I watercolored the image, then smudged on Distress Ink to bump up the color in a few spots. I did some reverse-dot stamping in the background, then added some painted white dots. I stitched around the edges and wah-la! A bright and happy card!
Be sure to check out the new "My Favorite" release if you are looking to acquire some fun new products (and let's face it- that is what we crafty folks do)!
Monday, April 18, 2016
My Cards and Tags: Butterfly Card Using Seth Apter Products
"Butterfly Beauty" is the theme for this week's Simon Says Stamp Monday Challenge, so I decided to see what would happen if I mixed Springy things like butterflies and pastels with Seth Apter's new industrial, gritty, urban-vibed products. Here's the result:
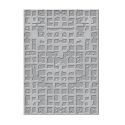
I started by using this fabulous Gridiron embossing folder on a piece of white cardstock as well as on the faux wood background paper I used. I rubbed some Distress Ink over it, as shown here:
Once I embossed the paper, I watercolored in the de-bossed sections, then I painted some Gesso and white acrylic paint over various areas for a more subtle pastel look and started building my layers. I added some dies (Coffee Ring and Drip Drop die sets) which I stamped text on, added some butterflies, some more Gesso, and then some Washi tape for the sentiments.
There are so many fun products that have just hit the market that it's hard to keep the old wallet in check! But remember- we're collectors; not hoarders. :) Happy crafting!
Here are the supplies I used from Simon Says Stamp to make my butterfly card:
Can't wait for you to whip out your butterflies and create something amazing! Upload your projects to the Simon Says Stamp Monday Challenge Blog so that you can inspire us and enter yourself to be a winner for the $50 Simon Says Stamp gift voucher!