One of my favorite challenge sites to browse is the Runway Inspired Challenge blog. It combines two of my loves: fashion and crafting! When I saw the fantastic floral frock featured (how's that for some alliteration? Try saying that three times fast!) I knew I had to enter.
And so I created this springy card of my own. It reflects the lovely bright hues in the inspiration dress as well as the feeling of garden parties and summer outings.
You know I'm a fabric addict, so I made this dress of out fabric strips which I collaged on top of each other. I smudged some ink over it in different places, attached it to a hanger, added a flower and was done! I also adore this sentiment stamp (The Ladies Are Going Out) by Inkadinkado. So many possibilities!
Thanks to this challenge which made me think of flowers even as I shiver at the several inches of snow still clinging to my lawn!
▼
Friday, January 31, 2014
Thursday, January 30, 2014
Tutorials: Vellum Feathers
Today I wanted to share a quick and easy way to make vellum feathers, which are all the rage in the industry right now. Here's the card I made, followed by step-by-step instructions about the feathers:
Start with a white piece of vellum. Cut out feathers either by hand or by using a die. I used the fabulous Feathers die from Lifestyle Crafts/We R Memory Keepers. I like this die in particular because it has several different-sized feathers on one single die.
Once you've cut out your feathers, use a scoring board to give the feathers a center crease:
The next step is to emboss the edges. You could use any shade of embossing powder, though I went with silver. Start by dabbing some embossing ink (I don't think you can beat Tim Holtz Embossing Ink) along the edge and center of your feather, then sprinkle embossing powder over your feather:
Important note! Vellum is lightweight, so before shooting your feather with a heat gun, grab a heat-resistant tool to hold your feather in place (fingers are not heat-resistant)! I used a bamboo skewer to hold down the feather while I hit it with the heat gun.
This is where the magic happens! I love how you can see the embossing powder totally change to a beautiful liquid sheen when heat is applied:
The last step is to color your feather. I like to use wedge-shaped make-up sponges to dab ink onto surfaces like this. I used Tim Holtz Distress inks and Colorbox inks and blended a couple of different colors onto each feather.
And that's it! I folded the feathers just slightly along the middle crease to make them more dimensional, then I added them to my card and wah-lah! You have some lovely feathers that will serve as the perfect embellishment for any craft.
Other supplies I used for my card include stamps from Lost Coast Designs (bird), Paperbag Studios (newsprint house) and EK Success (alphabet letters). The paper is from The Paper Studio, My Mind's Eye and Kaiser. I also used Ranger Jet Black Archival Ink and Recollections Metallic Silver embossing powder.
Sunday, January 26, 2014
My Other Creations: Whimsical Western Belt
This week's Simon Says Stamp Monday Challenge is to make something cowboy-themed. No offense to any cowboys out there, but big belt buckles came immediately to my mind. What can I say? I was intrigued...and slightly disturbed...by the self-proclaimed cowboys at my high school that would top off their super-snug Wranglers with a belt buckle the size of an hors d'oeuvre platter. For better or worse, that apparently made an impact on my subconscious. So I went with my own version of a big-buckled Western belt:
To make the buckle, all I did was find the lid of a tin, which I glued the Western picture to the bottom of. Then I covered the whole thing with a healthy layer of Glossy Accents glue. I'm loving Glossy Accents the more and more that I use it because it doubles as a resin substitute. If you do compare it to resin, it's nice because it's not at all as toxic-smelling as some of the brands that are out there. It provides a nice shiny coating (as thick as you want to go) for any sort of project you've whipped up. It works out great for jewelry in particular. Here's an angled close-up of just the buckle:
Isn't that a great picture from October Sky's Sasparilla line? The ephemera has a great sense of style and just the right bit of humor. I love how it says, "Tough as nails...even on Sundays." Classic! You go, girl!
I attached the buckle to a belt that I already had and stuck a playing card behind it just for the purpose of these pictures (I don't usually leave the house with gambling paraphernalia on my person). I also added some blingy jewelry to give it some added oomph. I like to incorporate old or broken jewelry into new accessory pieces.
As always, a kudos goes out to my trusty model, Gwendolyn, whom I rescued from a Gap that was going out of business several years ago. She's always willing to wear my wacky creations and since she's headless, she never complains.
I thoroughly enjoyed this project and it really strengthened my fondness for Glossy Accents! As always, you can find it and these other great items at Simon Says Stamp:

I can't wait to see how you interpret this week's theme! Don't forget to submit your creations to the Simon Says Stamp Monday Challenge blog for your chance to win free moolah to spend at Simon Says Stamp.
To make the buckle, all I did was find the lid of a tin, which I glued the Western picture to the bottom of. Then I covered the whole thing with a healthy layer of Glossy Accents glue. I'm loving Glossy Accents the more and more that I use it because it doubles as a resin substitute. If you do compare it to resin, it's nice because it's not at all as toxic-smelling as some of the brands that are out there. It provides a nice shiny coating (as thick as you want to go) for any sort of project you've whipped up. It works out great for jewelry in particular. Here's an angled close-up of just the buckle:
Isn't that a great picture from October Sky's Sasparilla line? The ephemera has a great sense of style and just the right bit of humor. I love how it says, "Tough as nails...even on Sundays." Classic! You go, girl!
I attached the buckle to a belt that I already had and stuck a playing card behind it just for the purpose of these pictures (I don't usually leave the house with gambling paraphernalia on my person). I also added some blingy jewelry to give it some added oomph. I like to incorporate old or broken jewelry into new accessory pieces.
As always, a kudos goes out to my trusty model, Gwendolyn, whom I rescued from a Gap that was going out of business several years ago. She's always willing to wear my wacky creations and since she's headless, she never complains.
I thoroughly enjoyed this project and it really strengthened my fondness for Glossy Accents! As always, you can find it and these other great items at Simon Says Stamp:

I can't wait to see how you interpret this week's theme! Don't forget to submit your creations to the Simon Says Stamp Monday Challenge blog for your chance to win free moolah to spend at Simon Says Stamp.

Sunday, January 19, 2014
My Other Creations: Alphabet Cuff Bracelet
This week's Simon Says Stamp Monday Challenge theme is the letter A. I thought of, "A is for Alphabet," which made me think of children, which made me think of wanting to protect my jewelry. Is that a bad mental connection?? What can I say? I've had too many bracelets and necklaces broken by well-meaning children who needed something to play with. So I decided to make an indestructible (more or less) alphabet bracelet which I could whip off and use to entertain any bored children that may wander my way. It's basically a long bracelet that wraps around my wrist that has elements/pictures that go in alphabetical order.
Behold! I wrapped it around a rolling pin for display purposes (see, Mom? Who says I never use that rolling pin you gave me?):
Here it is laid out flat and photographed in sections:
A-E: (apple, Bingo, cupcake, deer, egg)
F-I: (flowers, glasses, hanger, ice cream cone)
J-M: (Jack, key, lace, mustache)
N-R: (number nine, orange, pin, queen, rain)
S-U: (scissors, telephone, underwear)
V-Z: (van, witch, xylophone, yarn, Z).
To make this bracelet, I cut random fabric scraps into 1-inch (or wider) strips, then I sewed the strips together into one long strip.
Next, I went letter by letter. For dimensional objects (such as the Bingo chip and the key), I either sewed them onto my strip or adhered them with a strong fabric-friendly glue.
I stamped images onto fabric and colored over the ink with permanent fabric-safe markers to ensure the ink would stay put (this is what I did with the mustache and the witch, for example).
I also used patterned fabric and cut out already-existing images to add to my bracelet (like the glasses and the telephone).
For the deer, the Jack, the queen and the xylophone, I transferred paper images onto fabric. Any image transfer technique would work, but I used a gel medium technique. Simply brush a coat of heavy gel medium onto the colored side of your paper picture. Stick the picture, face-down, onto a piece of fabric. Let it dry overnight. When it's dry, soak the fabric in a bowl of water. Once it's soaked for awhile (half an hour or so), run the image under a gentle stream of tap water and rub the paper off of the fabric. The ink remains on the fabric, but the paper washes off. Some paper images work better with this technique than others, so you just have to experiment. Also be aware that the image will be backwards on your fabric since you flipped it when you glued it to the fabric. So if you're transferring a piece of paper with text on it, your text will be backwards on the fabric.
Here's another view of the bracelet on a display stand, which is closer to what it looks like on an actual wrist when it's all wrapped up:
This project was a lot of fun and we'll see if it ever comes in handy with little ones. If not, it's still a great conversation piece.
Here are some of the fab supplies I used from Simon Says Stamp to make my bracelet:

So how will YOU use the letter A this week? I love to see what your creative minds come up with, so be sure to share your project with us at the Simon Says Stamp Monday Challenge blog for your chance to win $50 to the Simon Says Stamp store. That buys a lot of crafty goodness!

Behold! I wrapped it around a rolling pin for display purposes (see, Mom? Who says I never use that rolling pin you gave me?):
Here it is laid out flat and photographed in sections:
A-E: (apple, Bingo, cupcake, deer, egg)
F-I: (flowers, glasses, hanger, ice cream cone)
J-M: (Jack, key, lace, mustache)
N-R: (number nine, orange, pin, queen, rain)
S-U: (scissors, telephone, underwear)
V-Z: (van, witch, xylophone, yarn, Z).
To make this bracelet, I cut random fabric scraps into 1-inch (or wider) strips, then I sewed the strips together into one long strip.
Next, I went letter by letter. For dimensional objects (such as the Bingo chip and the key), I either sewed them onto my strip or adhered them with a strong fabric-friendly glue.
I stamped images onto fabric and colored over the ink with permanent fabric-safe markers to ensure the ink would stay put (this is what I did with the mustache and the witch, for example).
I also used patterned fabric and cut out already-existing images to add to my bracelet (like the glasses and the telephone).
For the deer, the Jack, the queen and the xylophone, I transferred paper images onto fabric. Any image transfer technique would work, but I used a gel medium technique. Simply brush a coat of heavy gel medium onto the colored side of your paper picture. Stick the picture, face-down, onto a piece of fabric. Let it dry overnight. When it's dry, soak the fabric in a bowl of water. Once it's soaked for awhile (half an hour or so), run the image under a gentle stream of tap water and rub the paper off of the fabric. The ink remains on the fabric, but the paper washes off. Some paper images work better with this technique than others, so you just have to experiment. Also be aware that the image will be backwards on your fabric since you flipped it when you glued it to the fabric. So if you're transferring a piece of paper with text on it, your text will be backwards on the fabric.
Here's another view of the bracelet on a display stand, which is closer to what it looks like on an actual wrist when it's all wrapped up:
This project was a lot of fun and we'll see if it ever comes in handy with little ones. If not, it's still a great conversation piece.
Here are some of the fab supplies I used from Simon Says Stamp to make my bracelet:

So how will YOU use the letter A this week? I love to see what your creative minds come up with, so be sure to share your project with us at the Simon Says Stamp Monday Challenge blog for your chance to win $50 to the Simon Says Stamp store. That buys a lot of crafty goodness!

Sunday, January 12, 2014
My Other Creations: Paris Dress
With this week's theme of "Anything Goes" for the Simon Says Monday Challenge, I thought why not go to Paris? Mentally, that is. So I made this piece with a Paris-bound dress:
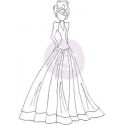
I started with the dress, which I made by laying out a bunch of fabric scraps. I even stamped some words on the fabric, such as "change." I sewed the strips together then stamped the "fabric collage" with a Prima doll stamp. The stamp was of a girl, but I cut off her head and arms (don't think I didn't feel barbaric and mean doing that, but this project was just about the dress)!
I attached the dress to a hanger and went to work on the background. I found this divine 12 X 12 background page in Tim Holtz's French Industrial paper pack. It has a lot of vintage images and I thought it was the perfect contrast to the dress.
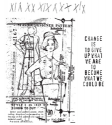
Since it seemed like the guys would be staring in awe at this dress (either because they were scared of it or impressed), I made up a little sentiment/story about the dress and the girl who might own it and stamped it onto the paper.
All in all, I liked how the piece turned out and it just goes to show what you can do if the hard work (like finding great vintage paper) is already done for you!
Here are the supplies I used for this project from Simon Says Stamp:

With a theme as broad as "Anything Goes," I can't wait to see what you come up with! Be sure to submit your fantastic creations to the Simon Says Stamp Monday Challenge blog for your chance to win $50 to the Simon Says Stamp store! Yay!
I started with the dress, which I made by laying out a bunch of fabric scraps. I even stamped some words on the fabric, such as "change." I sewed the strips together then stamped the "fabric collage" with a Prima doll stamp. The stamp was of a girl, but I cut off her head and arms (don't think I didn't feel barbaric and mean doing that, but this project was just about the dress)!
I attached the dress to a hanger and went to work on the background. I found this divine 12 X 12 background page in Tim Holtz's French Industrial paper pack. It has a lot of vintage images and I thought it was the perfect contrast to the dress.
Since it seemed like the guys would be staring in awe at this dress (either because they were scared of it or impressed), I made up a little sentiment/story about the dress and the girl who might own it and stamped it onto the paper.
All in all, I liked how the piece turned out and it just goes to show what you can do if the hard work (like finding great vintage paper) is already done for you!
Here are the supplies I used for this project from Simon Says Stamp:

With a theme as broad as "Anything Goes," I can't wait to see what you come up with! Be sure to submit your fantastic creations to the Simon Says Stamp Monday Challenge blog for your chance to win $50 to the Simon Says Stamp store! Yay!









.JPG)


