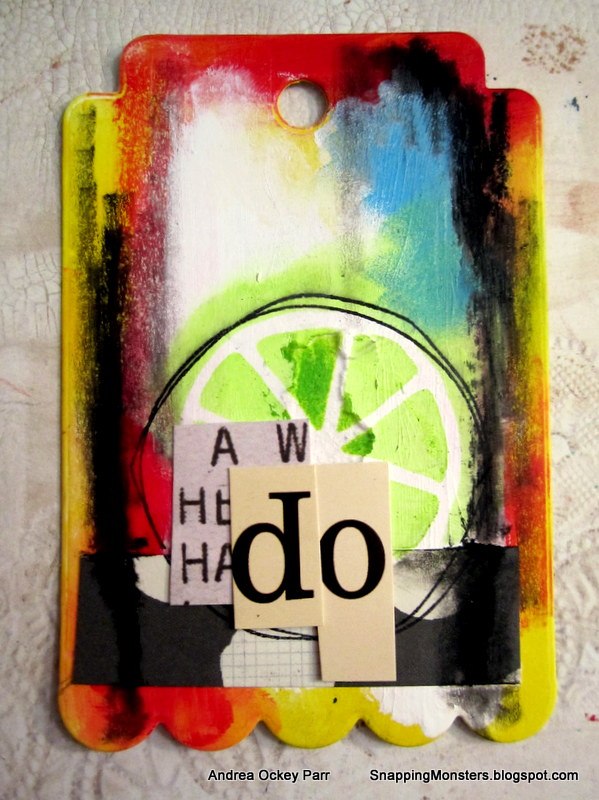
We're being inspired by food and drink this week at the Simon Says Stamp Monday Challenge Blog. I made a set of tags using a lovely citrus wheel as part of the background.
I love it when stamps and dies can serve double-duty and I love the spokey-spikey look of these citrus circles! They're from Concord & 9th's "Orange You Sweet" stamp set and corresponding dies. I also used the scribbly circle from the set to outline the citrus circles.
I used a variety of tag dies, too, which are listed below.
As usual, my starting point was Strathmore Mixed Media paper, which I painted around the edges of with acrylic ink.
I glued a band of patterned paper (polka dots from Simple Stories) to the bottom of each tag and also added in some scraps of Tim Holtz's Correspondence paper (one of my all-time favorite patterns).
I scribbled black around the edges using Prima Oil Pastel Crayons and smudged them a bit using a blending stump.
I cut out one of my citrus wheels and used it as a stencil, then cut some more out and glued them on to the tags. I colored sections with Distress Ink and Hero Arts ink. The big sentiment words (some words which I Frankenstein-ed together by cutting up individual letters) are flash cards from Tim Holtz.
Here are the supplies I used, which you can find at Simon Says Stamp:
Concord and 9th's Orange You Sweet stamp set
Concord and 9th's Orange you Sweet dies
Sizzix Big Shot
Pretty Pink Posh Scalloped Square Tags die
Studio Katia Dotted Shaker Tag 2 die
Reverse Confetti Thanks Tag die
Reverse Confetti Gift Card Holder Tag die
Sizzix Framelits Tag Collection dies
Dina Wakley acrylic paint
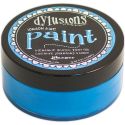
Dylusions acrylic paint
Strathmore Mixed Media paper
Prima Oil Pastel Crayons
Spectrum Noir Stumps
Simple Stories Good Vibes paper
Tim Holtz Correspondence paper
Tim Holtz Elementary Flashcards
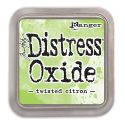
Distress Ink: Twisted Citron
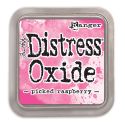
Distress Ink: Picked Raspberry
Distress Ink: Lucky Clover
Hero Arts: Neon Pink ink
Ranger Jet Black Archival ink
I'm excited to see how you pay homage to food and drink this week! Be sure to upload your creations to the Simon Says Stamp Monday Challenge Blog for your chance to win a $50 voucher to the Simon Says Stamp store!
▼
Monday, June 25, 2018
Monday, June 18, 2018
My Other Creations: Pen Pouch using Dina Wakley's Giant Funky Silhouettes Stencil
"Transport It" is this week's theme at the Simon Says Stamp Monday Challenge Blog. I made a pouch to be able to transport my pens from Point A to Point B.
My secret to making any sort of pouch or coin purse out of paper is to cover all the components with a clear type of material- in this case, peel and stick clear laminate. It "plasticizes" the paper (as if you've heat-laminated it) and makes it more hearty. Then I sew a zipper in and sew all the pieces together with a sewing machine. I did a full tutorial on this process a few years ago (including clear materials that worked and didn't work) that you can see here.
I gave some oomph to this silhouette shape by collaging pieces of patterned paper together and by adding a party hat.
My daughter and I had a lot of fun playing with Shrink Film, too! We drew and stamped shapes, threw it in the oven, and baked it until it shrunk down. This is how I made the cat charm on the zipper. I also made a tassel out of embroidery floss and yarn.
I built up my background with patterned paper, Washi tape, Gesso and paint. Love this face-filled Washi tape by Jane Davenport!
The only cautionary tale I will leave with you when making a pouch or coin purse or anything else with a zipper is to test the zipper a few times before sewing it in! There's nothing worse than putting a whole project together only to find that the zipper is defective! That's happened a time or two to me, so I have learned to be a perpetual zipper-tester!
Here are the supplies I used which you can find at Simon Says Stamp:
Grafix Shrink Film- White
Photoplay, Spring in My Garden 12x12 Paper
The Ink Road Meow Mix Clear Stamps

I'm excited to see what you come up with for this week's challenge! Upload your creations to the Simon Says Stamp Monday Challenge Blog for your chance to win a $50 voucher to the Simon Says Stamp store.
My secret to making any sort of pouch or coin purse out of paper is to cover all the components with a clear type of material- in this case, peel and stick clear laminate. It "plasticizes" the paper (as if you've heat-laminated it) and makes it more hearty. Then I sew a zipper in and sew all the pieces together with a sewing machine. I did a full tutorial on this process a few years ago (including clear materials that worked and didn't work) that you can see here.
I gave some oomph to this silhouette shape by collaging pieces of patterned paper together and by adding a party hat.
My daughter and I had a lot of fun playing with Shrink Film, too! We drew and stamped shapes, threw it in the oven, and baked it until it shrunk down. This is how I made the cat charm on the zipper. I also made a tassel out of embroidery floss and yarn.
I built up my background with patterned paper, Washi tape, Gesso and paint. Love this face-filled Washi tape by Jane Davenport!
The only cautionary tale I will leave with you when making a pouch or coin purse or anything else with a zipper is to test the zipper a few times before sewing it in! There's nothing worse than putting a whole project together only to find that the zipper is defective! That's happened a time or two to me, so I have learned to be a perpetual zipper-tester!
Here are the supplies I used which you can find at Simon Says Stamp:
Grafix Shrink Film- White
Photoplay, Spring in My Garden 12x12 Paper
The Ink Road Meow Mix Clear Stamps

I'm excited to see what you come up with for this week's challenge! Upload your creations to the Simon Says Stamp Monday Challenge Blog for your chance to win a $50 voucher to the Simon Says Stamp store.
Monday, June 11, 2018
My Other Creations: House with AALL & Create's Gabriel
This week's Simon Says Stamp Monday Challenge is to make anything but a card. I whipped out my Tim Holtz Tiny Houses die and created this 3D abode featuring a quirky little character named Gabriel by AALL & Create.
I started by cutting out the house pieces with my Sizzix Big Shot and stamped them with AALL & Create's Quirky Circles stamp. Once stamped, I cut some patterned paper into circular shapes and glued them inside the circles.
I colored my house with Dylusions acrylic paint and assembled it. I stamped, colored and fussy-cut Gabriel out and also cut a small section of a city skyline. I attached the skyline to the house with some foam squares to pop it out a bit and made Gabriel pop out even more by gluing him to a small wooden spool and gluing the other end of the spool to the house. The last step was to glue the "Be Brave" sentiment (a Tim Holtz Quote Chip) onto Gabriel.
Here are the supplies I used that you can find at Simon Says Stamp:
Tim Holtz Tiny Houses die
AALL & Create Gabriel stamp
AALL & Create Quirky Circles stamp
Sizzix Big Shot
Tim Holtz Correspondence paper
Simple Stories Hello Summer paper
Echo Park I'd Rather be Crafting paper
Sunny Studio Polka Dot Parade paper
Doodlebug Sweet Summer paper
Tim Holtz Cityscape Skyline die
Strathmore Mixed Media paper
Dylusions paint: Calypso Teal
Dylusions paint: Pure Sunshine
Dylusions paint: Lemon Zest
Dylusions paint: Fresh Lime
Dylusions paint: After Midnight
Ranger Jet Black Archival ink
Foam Squares
Ranger Non-stick Craft Sheet
I can't wait to see what you make (that isn't a card) for this week's Simon Says Stamp Monday Challenge! Upload your creations to the Simon Says Stamp Monday Challenge Blog for your chance to win a $50 voucher to the Simon Says Stamp store.
Monday, June 4, 2018
My Other Creations: Notebooks using Paper Artsy Stamps
"All Things Bright and Beautiful" is this week's Simon Says Stamp Monday Challenge Blog theme. We're also featuring Paper Artsy products. I made these two brightly-colored notebooks to fill the bill.
I started by stamping alphabet letters onto Strathmore Mixed Media paper. I heat-embossed them white, then sponged Distress Oxide over them.
I spritzed some water on the surface, then colored different parts of the page with Mermaid Markers. I also sprinkled on some Infusions color stain.
I cut the panel up and used it as patterned paper for the background of my notebooks. The tall notebook is a Prima Traveler's Journal that I painted white and built layers up on. I also added some stamping.
The thing I love about revamped notebooks is that they are artistic and useful. And when I re-do just the cover of a pre-made book, it is a project that doesn't overwhelm me. It's do-able and I'm all about do-able craftiness.
Here's the smaller notebook with the cover sewn on.
Here are the supplies I used that you can find at Simon Says Stamp:

I can't wait to see your interpretation of our theme this week! Upload your creations to the Simon Says Stamp Monday Challenge Blog for your chance to win a $50 voucher to the Simon Says Stamp store.
I started by stamping alphabet letters onto Strathmore Mixed Media paper. I heat-embossed them white, then sponged Distress Oxide over them.
I spritzed some water on the surface, then colored different parts of the page with Mermaid Markers. I also sprinkled on some Infusions color stain.
I cut the panel up and used it as patterned paper for the background of my notebooks. The tall notebook is a Prima Traveler's Journal that I painted white and built layers up on. I also added some stamping.
The thing I love about revamped notebooks is that they are artistic and useful. And when I re-do just the cover of a pre-made book, it is a project that doesn't overwhelm me. It's do-able and I'm all about do-able craftiness.
Here's the smaller notebook with the cover sewn on.
Here are the supplies I used that you can find at Simon Says Stamp:

I can't wait to see your interpretation of our theme this week! Upload your creations to the Simon Says Stamp Monday Challenge Blog for your chance to win a $50 voucher to the Simon Says Stamp store.


