Confession time: I'm lazy when it comes to craft construction itself sometimes and much more enjoy the decoration phase of the creative process. So here's a nifty trick I used on this project, and which I've also used in the past, to make a quick human female figure. Ready for the big reveal?? Re-purpose a jewelry hanger torso! You know the ones I mean: it's a girl in a dress, but she has a spinning hook device for a head and hooks where her arms should be so you can hang things from her. I usually find them at places like Ross and Home Goods for a few bucks each.
Here's what my angel started out like (I already removed the big hanger where her head should go before I took the picture):
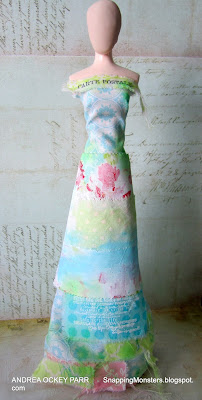
You can twist and pull out the hooks with pliers. Then you can either leave the dress on and build around it or remove it and create another one from scratch. I went from scratch, so here she is in her new outfit, which is basically a cotton print base layer:
Before you get too far along, you need to create her head and arms out of clay. I use Sculpey clay and mold the head shape and arms just by looking at the torso and shaping them to match. It takes a little practice, but you don't have to be a master sculptor to make a oval for a head and two snakes for arms. Leave a "neck hole" on the bottom of your head shape so you can just pop it on her neck after you bake it (like a Barbie head). And don't worry if the head and arms aren't totally perfect. If you add a lot of hair to your doll, you can't even see much of the head and arms anyway.
Embellish the dress while your clay pieces are baking. I added scraps of fabric to the base layer, then added ink and some stamping, too. I stamped some portions of various travel stamps and blended them into the fabric. I embossed some white text on the dress to finish it off.
After her head was baked (that sounds weird, but you know what I mean) and after I let it cool, I glued it onto her neck with hot glue. I also added some blush to her cheeks with pink chalk.
Next came the wings. These wings were made from water soluble paper. I made an abstract picture of green blobs on the computer, then I printed the image onto the paper. I sewed on the paper with criss-cross grid lines and then dissolved the paper in between some of the stitched grid lines. Kind of a tricky and time-consuming process, but I love the result. I also added some postage stamps to her wings for the Air Mail theme.
Lastly, I put it all together: the wings, the hair, the arms and the items she's holding. The hair is made from pink yarn. Here's a view of the whole girl from head to toe:
This project was a lot of fun and as always, I used several supplies from Simon Says Stamp to make it happen.
The Simon Says Stamp Monday Challenge Blog has a new theme every week for you to work your creative magic on! Make something wonderful following Simon's theme, post it to the blog (following the rules, of course) and you'll be automatically entered to win $50 at the Simon Says Stamp store! Wa-hoo! I drool at the mere thought of free money to spend at Simon Says Stamp!


