Monday, March 30, 2020

My Cards and Tags: Courage, Dear One Tag using Inky Antics' Stick Figure Fun

This week's Simon Says Stamp Monday Challenge Blog theme is to be inspired by our Spring mood board.  I love Spring because it represents hope for better things to come.  It brings warmth, brightness and the desire to move forward, which is what I chose to focus on with this tag.


The stick people on this tag are from Inky Antics' Stick Figure Fun stamp set, which I designed.  This stamp set has a special place in my heart because my sweet little 5-year-old daughter drew some of the images.  I love the free whimsicality of kid drawings and wanted to preserve that.  And of course, the message of courage seems especially poignant right now.

Here are the supplies I used, which you can find at Simon Says Stamp:


The Simon Says Stamp store is accepting new orders, but we can expect longer shipping times due to the corona virus, which has impacted every single one of our lives in a very real and very scary way.  We are all trying to stay afloat and with that in mind, Simon Says Stamp has made the difficult decision to suspend the $50 store voucher for this challenge.  But please continue to support the wonderful women who run Simon by sharing your art through these challenges.  Upload your creations to the Simon Says Stamp Monday Challenge Blog.  I know that I've personally gained a lot of hope and courage by seeing all of the crafty creativity that's out there, so please keep it coming!


Friday, March 27, 2020

Video Tutorials: Art Journal Page using Washi Tape, Paint and a Yearbook Page. Journal 1, Pg. 1

I've been trying my hand at art journaling lately, so I thought I'd start posting some videos of the pages I create.  Here's the first video (scary process for this non-technical whiz) showing how I made this page out of Washi tape, paint, and an old yearbook page.  Enjoy!


Monday, March 23, 2020

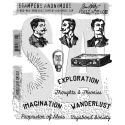
My Cards and Tags: Imagination Tag using Tim Holtz's Noble Gent Stamp Set

"Steampunk" is the theme this week at the Simon Says Stamp Monday Challenge Blog and I would be lying if I said I didn't find it challenging!  Gears and metal and machinery (which are the elements I think of first when I hear "steampunk") have never really factored into my aesthetic vibe.  Instead, I decided to celebrate the creativity and imagination behind all of those wacky steampunk inventions and innovations.

I started this tag with some gorgeous patterned paper from Stamplistic called "Cogworks."  I stenciled some turquoise dots onto it using Tim Holtz's Halftone stencil.

I'd been anxious to try Seth Apter's new line of Izink Ice glaze (this shade is called "Whisky Frost") and it did not disappoint!  It is smooth and translucent enough to have your background elements and colors still show through, but it is full of rich color itself.  It is a layering dream and I look forward to using it more.
Next I sprayed the tag with Dylusions Calypso Teal Shimmer Spray and let it dry.  Since I'd put my paper through a lot of wet stuff, I glued it onto some Strathmore Mixed Media Paper to add some sturdiness.  Then I smeared on acrylic paint in different colors.

While that was drying, I cut out and assembled the elements I'd be using to create my flying machine.  The wings and hat were cut out of some collage scraps I'd had leftover from a different project that were laying on my table.

All that was left was to assemble, which I did using my trusty UHU glue stick.  I finished this off by heat-embossing some white words at the bottom.

Does my project scream "streampunk"?  Hmmmmm.  Jury's still out, but I did have fun making this tag.

Here are the supplies I used that you can find at Simon Says Stamp:

Show us your steampunk skills by uploading your creations to the Simon Says Stamp Monday Challenge Blog for your chance to win a $50 voucher to the Simon Says Stamp store!

Monday, March 16, 2020

My Cards and Tags: Tags using Inky Antics' Quirky Alphabet

Using stencils is the challenge of the week over at the Simon Says Stamp Monday Challenge Blog.  I used some of my favorite stencils to create these tags:


I started by painting these tags with the new Dylusions paint that comes in the squeeze bottles.  I've wanted Dylusions to come in a squeeze-type of bottle for years because I'm lazy and get tired of screwing the lids on and off of the jars this paint came in previously.  I also liked how the squeeze bottle paints came in some new colors.  I gave them a try on these tags and have to say that the texture of the Dylusions paint in the squeeze bottles is much thinner than the paint that came in the "old" screw-top jars.  I guess it had to be thinner to squeeze out of the bottle easily?  Or maybe my old paint thickened up after a few years?  All I can say is they're definitely different.  I'm not saying it's bad that these new paints seemed thinner, but it might make a difference depending on what "look" you're going for on various projects. The paint in the jars is thicker and gives more opaque coverage than the paint in the squeeze bottles.  I love the convenience of the squeeze bottles, but the paint does not act the same.  I was going to swap out all of my old Dylusions jars of paint for the new squeeze bottles, but after seeing the difference in coverage and opacity, I'll hang on to both.

After painting the backgrounds, I stenciled over the top with white paint and smeared some extra on to tone down the colors a bit.

The next new product I whipped out to try on these tags is Dina Wakley's Gloss Spray.  I have a lot of different kinds of sprays, but these are cool because they still look wet even after they dry (hence the "gloss" name).  They also have the slightest bit of texture to them so that you can feel where they were sprayed if you run your hand over your surface.  These are definitely a fun product and are spot on as far as color-matching goes with Dina's acrylic paints.  The spray says it's Dina's Turquoise and it is indeed Dina's Turquoise!  The tag on the left has Dina's sprays on it (Olive and Turquoise) and I think they are unique enough to justify purchasing them.

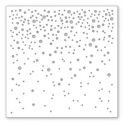
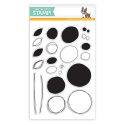
I stamped some circles, painted them, and added acrylic paints elsewhere.  Then I stenciled over everything with more white acrylic paint and Simon's Falling Snow stencil.

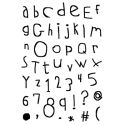
I added sentiments as the last step by stamping words using Inky Antics' Quirky Alphabet stamp set.


Here are the supplies I used, which you can find at Simon Says Stamp:

Get our your stencils and get busy!  Upload your creations to the Simon Says Stamp Monday Challenge Blog for your chance to win $50 to the Simon Says Stamp store!