Monday, June 26, 2023

Simon Says Stamp Monday Challenge: Bookmark using Concord & 9th's Swatchbook Dies

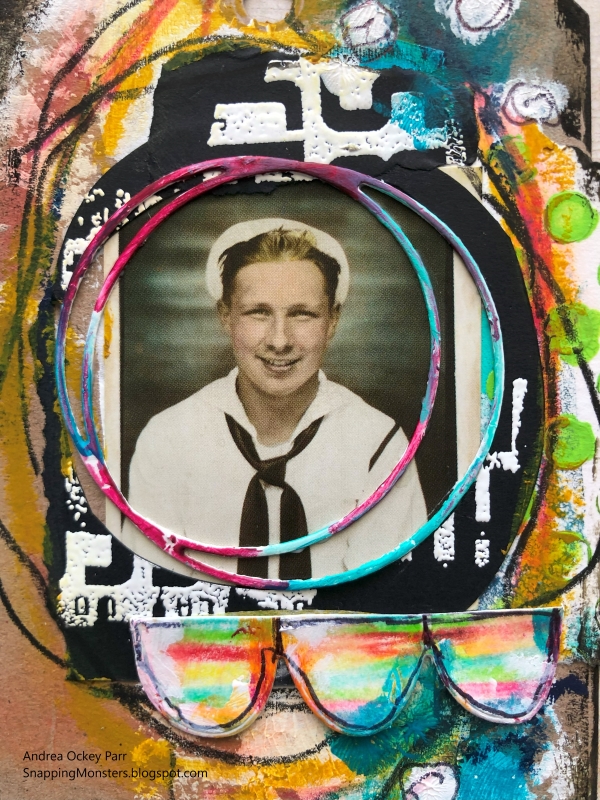
"Vacation" is this week's Simon Says Stamp Monday Challenge theme and there's nothing that I like better than relaxing on the beach with a good book in hand!  In honor of that past-time, I made a bookmark.


It just so happens that Concord & 9th's adorable Swatchbook Dies are also the perfect size to make a bookmark.  I cut this one out of Strathmore Mixed Media paper using my Sizzix Big Shot.  I heat embossed some stamped letters onto teal cardstock using My Favorite Things' Connected stamps and added scraps of that to my bookmark.


Next I covered some sketch paper with watered-down acrylic paint and Infusions color stain.  Once that dried, I doodled on it with Dina Wakley's Scribble Sticks, then activated some of the scribbles with water on a brush.


I tore my collage into scraps and glued those to my bookmark, along with some of Dina Wakley's Collage Words tissue paper stuff.  I did some more blending with white paint and then typed the "Read more" sentiment on a typewriter, cut it out and glued it on. 


I cut a scallop shape out of Simple Stories' Flea Market patterned paper and glued that to the side.  I finished off my bookmark by outlining the edges with a black pen and adding strips of fabric to the top.


Here are the supplies I used that you can find at Simon Says Stamp:

How will you celebrate vacations this week?  We are excited to see what you come up with.  Upload your creations to the Simon Says Stamp Monday Challenge Blog for your chance to win a $25 voucher to the Simon Says Stamp store.


Monday, June 19, 2023

Simon Says Stamp Monday Challenge: Pick a Number Notebook using Elizabeth Crafts' Number Reinforcers Dies

"Pick a Number" is this week's theme at the Simon Says Stamp Monday Challenge Blog.  I made a notebook cover using Elizabeth Crafts' Number Reinforcers Dies as the numeric element.


I started with a piece of Strathmore Mixed Media paper cut to the same size as this little notebook's cover.  I sprayed it with some Dylusions Calypso Teal Ink Spray through Tim Holtz's Dotted Stencil.  Then I added some yellow and turquoise and let the colors drip around a bit with a spritz of water (not that you see any of this in the final product)!


I added some patterned paper from Dina Wakley's Ledger 1 set and Simple Stories' Flea Market collection.


At this point, my mind said "red stripes!" so I cut a frame shape out of Tim Holtz's Specimen die set and drew red lines on it with a red Distress Marker.  I also cut and painted a scalloped edge.  Then I cut the number 12 flag-looking thing using the Elizabeth Crafts die set and stuck some AALL & Create washi tape on the front, then painted the rest.


Time to assemble, so assemble I did!  I layered everything, glued it down, then stamped the sentiment onto a piece of paper and added it on top.  The sentiment is from Tim Holtz's Theories stamp set.


I sewed the collage to the cover of my notebook and this project was done!

Here are the supplies I used that you can find at Simon Says Stamp:

How will you add a number into the mix this week?  Upload your creation to the Simon Says Stamp Monday Challenge Blog for your chance to win a $25 voucher to the Simon Says Stamp store.


Monday, June 12, 2023

Simon Says Stamp Monday Challenge: Masculine Tag using Waffle Flower Nesting Tag Dies, Studio Light Scallop Fun Die and Simon Says Stamp Circle Loops Die

We're going with a masculine theme this week over at the Simon Says Stamp Monday Challenge Blog.  I made a tag, which features this dapper gent, by utilizing some of my favorite dies.


I started by cutting out a tag shape using Waffle Flower's Nesting Tags die set and Kraft Heavystock paper.  Then I slathered on some white paint.  While the paint was drying, I dug out my gel printing plate and some stencils and made some painty paper for the background.  Then I stamped and heat embossed a black and white scrap paper using embossing ink, Tim Holtz's Faded Type stamp set and white embossing powder.


Time for assembling!  I tore a scrap of the gel print off and glued it to the tag, then cut a circle/ring shape out of the black and white paper.  I added paint and grabbed this sailor guy image from Tim Holtz's Photobooth pack and layered everything together.


I made some yellow and navy circle color additions with Distress Crayons.  Then I used Dina Wakley's Scribble Sticks to add some reds and oranges.  I thought the tag needed more, so I cut a scallop shape using Studio Light's Scallop Fun die set and a ring using Simon's Circle Loop dies.  I colored a line pattern on the scallops using Scribble Sticks and smudged paint onto the circle shape.


I added some scallops to the tag and then glued the circle around the sailor guy's head.  I finger-painted some white dots on the background and threw in some scribbles.  I added some blacks and browns around the edges of this tag and it was done!


Here are the supplies I used that you can find at Simon Says Stamp:

Create something with our masculine theme and upload it to the Simon Says Stamp Monday Challenge Blog.  You could win a $25 voucher to the Simon Says Stamp store and we always love to see your creations.


Monday, June 5, 2023

Simon Says Stamp Monday Challenge: Earrings Made Using Tim Holtz's Remnants Stamp Set, Loop Pins, and Alcohol Ink

 "Not a card" is this week's Simon Says Stamp Monday Challenge theme and we're also featuring products from Tim Holtz.  I decided to make a pair of earrings (because I love, love, LOVE big bold jewelry)!


There's this stamp set by Tim Holtz, Remnants, that has the most gorgeous big rectangle of chunky blocky text!  I use it often and whipped it out again for this project.  I stamped the text image in black onto white paper and while that dried, I found some thin metal that I cut into upside-down arch shapes.  I cut the stamped paper and glued it to the metal pieces, then dabbed acrylic paint around the edges.  I also stamped a plus sign from Tim Holtz's Glitch 2 stamp set and added some dots and more paint to those little squares.


As long as I was decorating earrings, I thought, why not make the back sides fancy, too?  I stamped text from Tim Holtz's Theories stamp set onto some paper and glued that down on the back side of the earrings, then painted more dots and smears all around.  I used a Crop-A-Dile tool to cut some bigger holes through the earrings.


I wanted to bring some beads to the party, so I found some white beads in my stash and dripped different colors of alcohol ink onto the beads and let them dry.


I glued the plus signs on top of the text background.  Last but not least, I found some Tim Holtz Loop Pins that worked perfectly to hold some of my beads in place.  I used some straight pins for the others.  Here are the components all laid out and ready to be assembled:


I put everything together and this is the end result.  This is what they look like on the front and on the back.


Here are the supplies I used that you can find at Simon Says Stamp:

What will you make this week that's not a card?  We can't wait to see your creations!  Upload them to the Simon Says Stamp Monday Challenge Blog for your chance to win a $25 voucher to the Simon Says Stamp store.