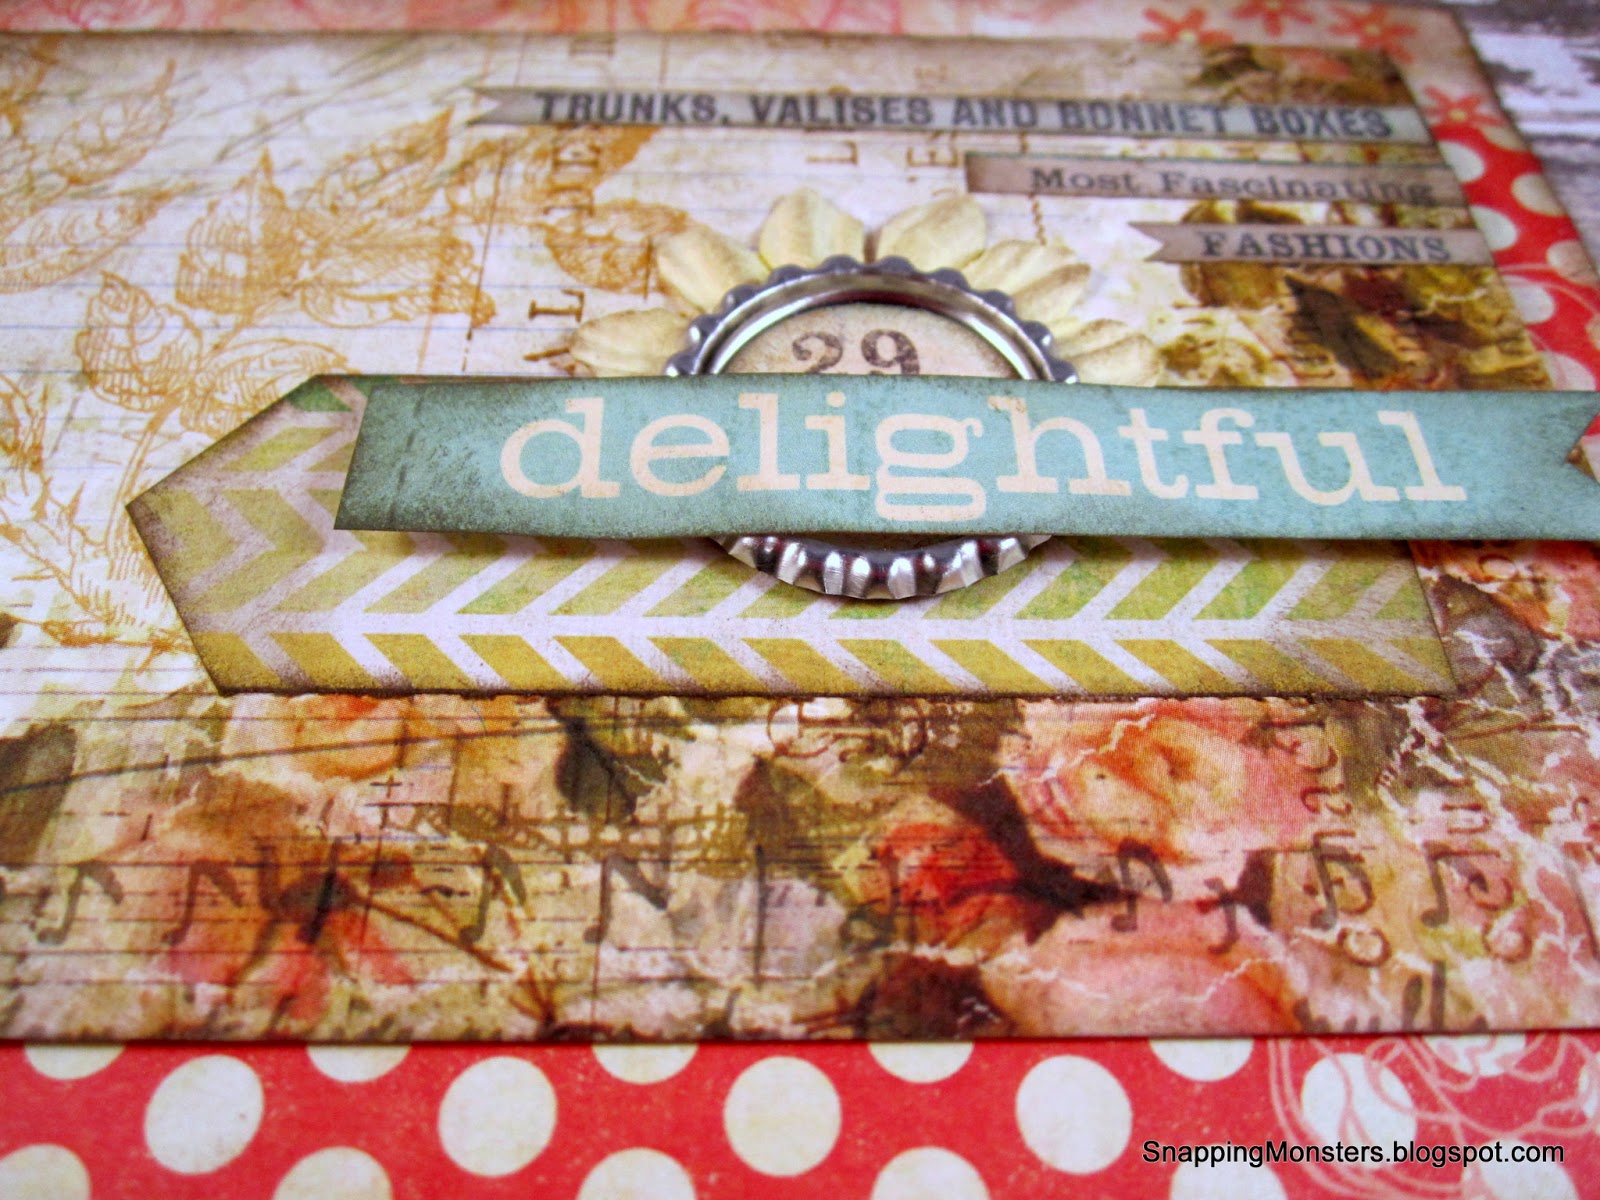
Well kids, it's time for another fantastic card challenge from SOUS (Stuck On U Sketches)! Have you checked out the SOUS blog yet?? I'm telling you-- I'm a believer! I never used card sketches much until I discovered their blog. Now I always look forward to their card sketches and love to "fill in the blanks," as it were. So here's the card I created....
....from Leah Schaeffer's sketch (she's awesome, by the way):
For my card, I used paper from Recollections and Pink Paislee. I also threw in a Prima flower (cause you know by now that's just how I roll) and a bottle cap from The Paper Studio.
The cool thing about the bottle cap is that it's pre-flattened. Not that I don't enjoy getting out my aggression by smashing a bottle cap every now and again, but I thought these were kind of a nifty variation.
I've included a dimensional shot so you can see how nice and flat the bottle caps are:
All of the text on this card was cut out from printed pages and of course, I had to finish it off with polka dots.
Thanks again to the ladies who run the SOUS blog and for my fellow Design Team members. They're always inspiring!
Ahhh February! Love is in the air, but I must say that it's easy for this holiday to be a little heavy on the romantic cheese. I absolutely adore the soft shabby chic look, but for this particular "romantic" card, I wanted to try and make it look...grungy-ish instead of lovely-dovey just to mix it up a bit. So here is the card I came up with:
My card was based on this fine sketch from the ever-talented Leah Schaeffer:
For my card, I used paper from Tim Holtz, My Mind's Eye, Basic Grey and the Paper Studio. The clock image is also from Tim Holtz (I cut it out of a piece of clock-patterned paper). The flowers are from Prima and the adorable little heart clip is from Recollections.
To finish it off, I stamped the "any time / anywhere" sentiment with alphabet letter stamps from EK Success and Studio G. I'm always fond of alphabet stamps because you have the freedom to spell out whatever you want.
This was a fun sketch to work with and I enjoyed exploring sort of a new "look" for a romantic-themed card.
So I whipped out my Valentine's decor the other day and it was looking a little...sparse. I wanted something new to put on the entryway table, so I decided to make a Valentine's card, then frame it! (Picture a triumphant "Duhn-duhn-duhn-duuuuuhn" sound right now)! I know- the idea of framing a card is not rocket science, but for some reason, I've never done it before. So may I proudly present my framed Valentine's card:
For this piece, I used a lot of supplies from the Love Note collection by Fancy Pants Designs. LOVE what they come up with! The background paper is from that collection, and then I shot a spritz of "pretty pink" color mist on it (Mister Huey's brand).
I used a Chevron stripe sticker (also from Fancy Pants) and layered two pieces of fabric on top of it. I punched a heart out of some pink corrugated paper (yep-- Fancy Pants again) and stuck it behind my sentiment.
To embellish, I added a mini pink binder clip and attached a Fancy Pants "true love" sentiment sticker.
Wah-la! Done! And I must say, framing my first card was rather satisfying. I decorate my craft space with my own artwork and projects all the time, but this framed card is the first piece of my artwork that's oozed into the main living area of the house. Kind of a cool little milestone!
And hey- you know what February means, right? It means we are only ONE month away from the Scrapbook USA Expo!!! Yipppeeee! Don't forget to mark your calendars, pack your bags, or do whatever else needs to be done to be ready for the Expo that will happen on March 22nd and 23rd in Utah! It will be epic, as always, and Fancy Pants (along with so many other inspiring brands) will have their wares up for grabs. Check out the Scrapbook USA Expo website for all you need to know to take part in this crafty extravaganza.
Welcome, welcome to the SOUS 100th Sketch Blog Hop! How fun is it to see all the projects these talented ladies came up with based on the same sketch?? If you made it here, you've come from Annette's blog and I am the last on the list! If you stumbled here randomly and don't know what in the heck I'm talking about, then head to the Stuck on U Sketches blog to start off right!
Without further ado, here is my card:
My card was based on this sketch, which I admittedly took a few liberties on.
For starters, I decided to scoot the rectangles over to the side so that they overlapped instead of being spread out (what can I say? I was having space issues!)
I also brought in some fabric and used a pastel palette to give it that romantic vibe.
As for materials, the stick pins are from Maya Road, the paper is from Kaisercraft and Prima and the lace flowers are from Recollections. The sentiment is actually from a piece of fabric that had a bunch of text sayings on it. I cut it out and added it to the card. I finished everything off with a little Tim Holtz distress ink.
All in all, what a great blog hop it's been! Congrats to Stuck on U Sketches for 100 fantastic and inspiring sketches!
Now that you're done, make sure you go back to the SOUS blog and leave a comment that you've finished the hop!
I have seen SO many adorable chalkboard cards lately! Some of them are computer-generated, but I thought I'd try my hand at the chalkboard look. Here's the result:
Since this was my first chalkboard attempt, I don't know what's "right" or "wrong," but I can at least tell you what I did. I started with a piece of DCWV black cardstock and VersaMagic ink in the shade of "Cloud White."
The stamped image is actually two stamps. The bottom part (the "Friends Forever" sentiment), is from TPC Studio and I bought it at JoAnn's. The bird part is from Lost Coast Designs. I stamped them onto the black cardstock with the VersaMagic ink, then shook on some opaque white embossing powder ("Snow") from Recollections. After shaking off the excess powder, I shot it with my heat gun for the raised embossed look.
I dabbed a Kleenex into the white ink, then smudged and rubbed it onto the black cardstock for that erased chalk look. I finished off the card with some patterned paper from My Mind's Eye and 7 Gypsies and a paperclip.
The chalkboard look has definitely been a fun trend to see and there are all sorts of variations you can do with it. I look forward to exploring it more!
Wow! You know I always love the card sketches that SOUS provides, but this one was especially fun to work with! Here's the card I made:
And here was the sketch I based it off of, which was created by that ever-clever Nanne Harry!
My card is made from a gorgeous pastel paper collection called "Butterfly Garden" by Pink Paislee. The light blue arrow with chevron stripes is from My Mind's Eye. I also incorporated a 4-inch doily from Wilton that I found in the baking section at Michaels.
As usual, the flowers are from Prima (LOVE Prima!) and the pearl stick pin is from Maya Road. The baker's twine is by American Crafts and the button is also from My Mind's Eye. I threw on a little scrap of polka-dot fabric to give it some flair.
I made a ticket using the Tim Holtz ticket strip die and I stamped it with a crown image from Heidi Swapp. I inked around most of the edges with Tim Holtz Distress Ink, Walnut Stain color.
My home town has been hit with more snow than what we know what to do with lately, so I'm pretty sure my brain is frozen from all of the inhaled sub-zero air. And hey- when your brain's in frozen mode, there's nothing better than finding a great card sketch to inspire you! I'm telling you- if you need some fabulous sketches for either cards, layouts or die cuts, check out the Stuck On U Sketches blog. I haven't been on their Design Team for all that long, but I've honestly loved every minute and the inspiration these talented ladies provide has been phenomenal!
It's Thursday night and it has been snowing ALL day! I'm talkin' mega white stuff out there. It's bitter cold and the sky is frozen gray gloom, which is exactly why I felt the need to post a picture of my Little Blue Dress card. Doesn't it just say Spring and flowers and sunshine and posh garden parties and lemonade??
NOT that I'm one of those "the grass is always greener" people, and snow really is beautiful in its own way, but I'm just saying that it's nice to have a reminder of warmer days when you're inhaling air so cold that it instantly freezes the inside of your nose (not even kidding).
To make this card, I used an Inkadinkado dress stamp which I outlined in black with my sewing machine. I layered up the fabric, stamped the sentiment, inked here and there, then glued it all to a divine piece of polka-dot background paper from Fancy Pants.
Well, a quick glance outside reveals that the snow is still falling. Now that I've had this little moment of Spring, there's nothing left to do but hope I get snowed in. After all, it's Friday Eve, the glue gun's already plugged in and the hot chocolate is calling my name! Doesn't get much better than that!
Happy first Counterfeit Kit Challenge! Our task? Use the counterfeit kits we made, plus COOKIE CUTTERS, and create a masterpiece! Whoa Nelly! A baker I am not, so my first task was to locate the baking supply section at Michaels. :) Once I found it, I lucked out and found an awesome cookie cutter set that was made for making gingerbread houses. So long story short, here is my creation: A Magnetic Cookie Cutter Calendar!!
So let's break it down! You may recall that this is the kit I assembled that I would be using for this project:
Here's the Gingerbread cookie cutter set I bought (picture courtesy of the Wilton website since I forgot to snap a picture of mine before I destroyed...ahem...re-purposed it):
So I wanted to elongate the shape of the house, so I cut the bottom of the rectangle shape and the bottom of the triangle shape, bent the edges and combined them into one big house shape. I glued the two shapes together with E6000 and clamps. It's about 10 inches high and 5 inches wide.
I knew early-on that I wanted this thing to be some sort of magnetic memo board or calendar, so I traced my house frame onto a flat sheet of thin metal. I then used a metal tool to cut it into a house shape (sorry I can't be more specific: my husband bought this tool from a classified ad and the best way I can describe it is like a paper-cutter with a lever, only when you pull the lever down it cuts metal instead of paper. I don't know what it's called, but it is a champ)!
Important note! Test the metal with a magnet to make sure it's actually magnetic! I did this whole process with a piece of non-magnetic metal and had to re-do it once I watched my magnets slide off!
I laid the metal house shape into the house frame and glued it to the flat bars on the back (see the bars on the back of the cookie cutters?) Here's a picture of the back of the project (pretty it is not):
Once that was all situated, it was just a matter of covering the whole thing with paper, which I did. I glued the paper down using an industrial-strength glue stick that works on all surfaces. This is what it looked like at that point:
I made the scallop roof edges from cutting out the circular token-looking things from one of the pieces of patterned paper and bending them over the roof. I may have also cheated with the bright pink strip of paper because it was the back side of one of the pieces I had in my kit.
Lastly, I made the separate elements that are removable:
I glued a magnet to a Tim Holtz clip and also added a magnet to the back of the bottlecap with the button, yarn and pin. I put some more patterned paper on the January calendar for some added oomph. The magnets hold up the calendar.
I also added some glass bottles (one that's filled with "spunk" and another with happy-looking glitter). I added a vintage thimble as the final touch.
So how is this a "calendar"? Well, I'm usually adept at knowing what day it is, but what I really wanted was a monthly reminder of my crafting deadlines. So the paper with the 6, 11, and 15 are dates in January that I had crafting projects due, along with an abbreviated description of the project.
When February rolls around, and subsequent months, all I'll have to do is switch out the calendar card and make a new piece of paper with February dates noted.
So there you have it! A use for cookie cutters that did not force me to spend time in the kitchen! That, my friends, is a success for me! And the bonus is that now I'll stay more organized and have a visual reminder of all those exciting crafting projects on the horizon.
Here are two cards I made for a challenge that required using fabric and hearts:
Isn't that stamp the greatest?? I fell in love with it immediately. It's designed by Jane Davenport and is available for purchase on the Stamping Bella website (if you've never browsed Stamping Bella's, there are TONS of cute girly stamps-- all on unmounted rubber).
For this one, I incorporated the tiny hearts onto an old button card and stitched them in the center to make them look button-esque. I decided to go with a sewing theme.
Happy 2013! Now we'll just see how long it takes me to stop writing 2012 on stuff (my average is about a two month transition)!
Anyhow, what HAS started this year out in spiffy style is the fantastic January 2nd card sketch by the ever-inspiring Nanne Harry. We were encouraged to utilize scraps for this card, so here's the scrappy finished product I came up with:
Here's Nanne's sketch that I based my card off of:
You'll notice that I made a few changes. I only used two hexagons and created the rest of the cascade pattern from vintage ephemera and scraps. I wanted all of the pieces to reflect the arts, travel and inspiration. The "daily double" race ticket and DA issue stub are vintage while the theatre tickets and "Metro" word are from Tim Holtz.
I used two different Spellbinders nestabilities die sets for this card: the Hexagons set and the Labels Eight set (center where sentiment is stamped).
The sentiment is one of my all-time favorite quotes and comes from the Tim Holtz Stamper's Anonymous "Purely Random" set. The lightbulb is also from Tim Holtz. I added a fabric scrap and Prima flowers then attached the whole thing to some paper from My Mind's Eye.
All in all, this sketch was a great one to launch 2013 and I can't wait to see what else those clever ladies at Stuck on U Sketches come up with!