Sunday, February 16, 2014

Tutorials: Make Your Own Silhouette Template

The theme over at the Simon Says Stamp Monday Challenge blog this week is "cameo," whether that be a traditional cameo silhouette shape or a different interpretation (like when someone does a surprise "cameo" appearance in a movie).  As I thought about cameos, I got to wondering if those classy heads every wanted to sprout some legs and escape the confines of the broach, necklace or frame they were trapped inside.  So I decided to expand the idea of a cameo to a full silhouette for this week's project.  And I made the silhouette template myself.  I'll show you how easy it is to do:


There are already some great silhouette templates/stencils and stamps on the market, but it's also quite entertaining to make some of your own.

Start by flipping through magazines until you find a human in a shape that would make an interesting silhouette.  Here's the picture I found, which was from a Bluefly ad in an old magazine:


Make sure that the silhouette you choose has plenty of open space between the arms, etc.  Remember that the only part that will show is the outline, so you want to ensure that the shape will be recognizable as a human.

Cover both sides of the magazine picture with clear packing tape.  This gives it stability and will allow you to paint or stamp over it, if desired.


Once you've taped over the image, cut it out and see how it looks.  I like my silhouettes to be a little more cartoony, so when I cut out this girl, I trimmed off a little extra to make her look more doll-like and less realistic.  I also rounded out her head where her hat was (since I didn't want her to look like a box head), and I also removed her purse to further simplify the shape.


Tuh-da!  Now you have a perfect template that you can either trace around or that you can use as a mask to paint over, etc.  And because it's encased in packing tape, it's good for several uses.

Next I began on the background.  I used heavy watercolor paper and started layering on Washi tape and scraps of patterned paper.


I added some smears of acrylic paint and Tim Holtz Distress paint and when it was dry, I spritzed on some Dylusions ink spray in Cut Grass, Funky Fuchsia and Vibrant Turquoise.


I stamped on some background polka dots and reverse polka dots with a homemade stamp.  I also repeated the word "dream" with a Tim Holtz stamp and stamped out a great quote by Helen Keller.  I added some black gesso to the outer edge of my paper to create the look of a frame.


Lastly, I traced my stencil girl onto some patterned paper.  To make her stand out even more, I added some shadowing with ink and drew around her edges with a black Sharpie.  I made her some wings out of paper that I inked up, sewed "graph lines" on and then dissolved in various sections for a tattered look.  I attached them to my background and used 3D dots to secure the silhouette:


And here she is as the finished product.  And all because I felt bad for body-less cameo heads!


There are so many great products I used to bring this piece to life, which you can find at that store we all know and love-- Simon Says Stamp:


So what clever cameo ideas will you think up this week?  Do share your genius with us at the Simon Says Stamp Monday Challenge blog because it's always wonderful to see what you create and you also get a chance to win $50 of Simon Says Stamp store credit!  Yipee!!

50dollar_voucher_600px

Sunday, February 9, 2014

My Cards and Tags: Valentine's Day

This week's theme at the Simon Says Stamp Monday Challenge blog is "We love stamps!"  A look at my bank statement would confirm that this is definitely true for me! 

One of my favorite types of stamps are people stamps, which I enjoy adding kooky accessories to in order to create new characters to fit my creations.  So here's a Valentine's Day card I made with that suave sophisticated gent from Wendy Vecchi's "Call it Art" stamp set:


Half of the work of this card was already done for me thanks to the Glitz "Birthday Wishes" paper pack, which provided some great background paper to use.  And my guy was easy to color using Spectrum Noir markers.  I wanted to highlight Valentine's Day, so I put a heart around the number 14 on the calendar.  It didn't show up boldly enough, so I cut out another number 14 and glued it on top to make it stand out a bit more.  Then I made a sentiment that says, "He believed in love."


I appreciate the versatility of our leading man and this time I added some glasses and a pointy hat to him.  But that's not his only look!  Just for fun, I went back through my projects and pulled some other versions of him that I've made.

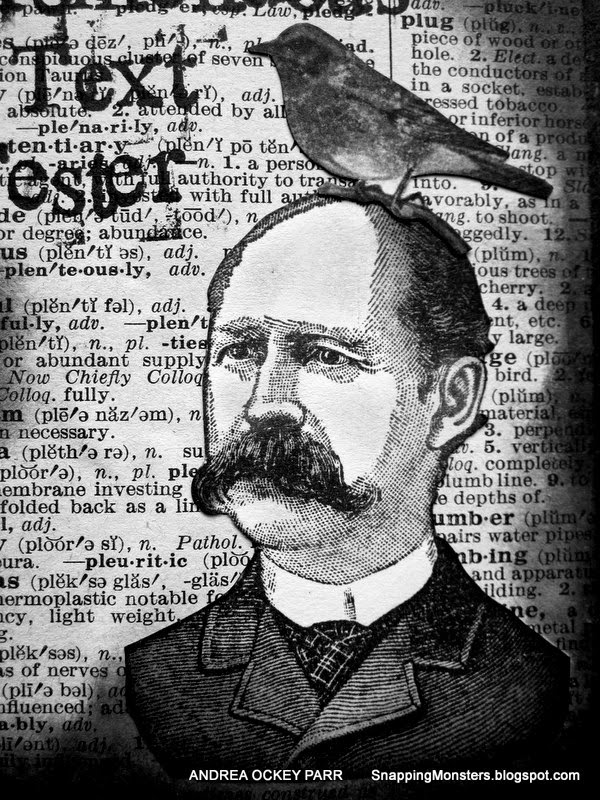
Here he is as a respected scholar, perhaps published in a newspaper with a feathered friend on his head:


 Here he is as an eccentric inventor-photographer:


And here he is drowning in a sea of mathematical numbers and wearing a dunce cap (welcome to my life in junior high and high school, folks! ):


But for now, I really do love my "in love" version of him best!


To make this card, I used the following fantastic supplies that you can get at that store we all know and love-- Simon Says Stamp:


With such an open theme like, "We Love Stamps," I cannot wait to see what you create for this week's challenge!  Remember to share your projects with us on the Simon Says Stamp Monday Challenge blog for your chance to win $50 to spend at Simon Says Stamp!
50dollar_voucher_600px

Sunday, February 2, 2014

My Cards and Tags: Love Letter

Ah, love letters!  Such a perfect theme for February and for us English majors and librarians who go goofy over sonnets and eloquent verse!  So of course, for this week's Simon Says Stamp Monday Challenge, I made a mini love letter with a little Longfellow thrown in.


The Webster's Pages "Postcards from Paris II" line is perfect for all things whimsically romantic.  Their collection includes mini craft bags which make the absolute perfect sleeve for tags.  With these lovely bags already made, half your project is done!

And here's the inside tag, which features the epic words of Longfellow, as promised.  I typed it out on an old typewriter of my dad's to keep with the idea of "love letters" and how people used to actually use typewriters and paper (gasp!) to communicate feelings!


"The dawn is not distant, nor is the night starless; love is eternal."  Can you hear me sighing happily?  This is the quote that my husband and I put on our wedding announcements, so it always has a special place in my heart (as does he-- I'm basically the luckiest woman ever to have him in my life).

I attached the flower to the tag instead of the bag just so that the tag would retain some "visual oomph" when it came out of the bag.  I used the Avery Ellle Embellish It Flower Die to make this rose, which I then glued on top of a Prima flower.  This die is unique in that it presents a new way to assemble 3D flowers (separate petals assembled with a brad as opposed to a long spiral that you twist into your flower shape).


Lastly, you may notice I used a heart pin.  I didn't figure it would be very romantic to have someone get stabbed on my tag, so I always snip off the tip of pins and then sand it down.  It doesn't make the pin totally blunt, but it does help make it safer.

Here are some of the fantabulous supplies I used on this project, which you can get at Simon Says Stamp:


Now I just know that all you crafty folks out there have a multitude of ideas on how to interpret "love letters," so get crafting and submit your creation to the Simon Says Stamp Monday Challenge blog.  Why?  To spread some creative love, of course!  And you could win $50 to the Simon Says Stamp store just by entering.  That's what I call sweet!
50dollar_voucher_600px