Monday, July 1, 2013
My Other Creations: Fairy Tale Village
Sunday, June 23, 2013
Tutorials: Making Buttons Using Molds and Sculpey Clay
So in my last post, we talked about ways that wooden and plastic buttons could be altered. But what if you want to make your own buttons? These days it can be easily done if you're willing to put in a little elbow grease!
Here's a tag I created featuring one of these made-from-scratch buttons:
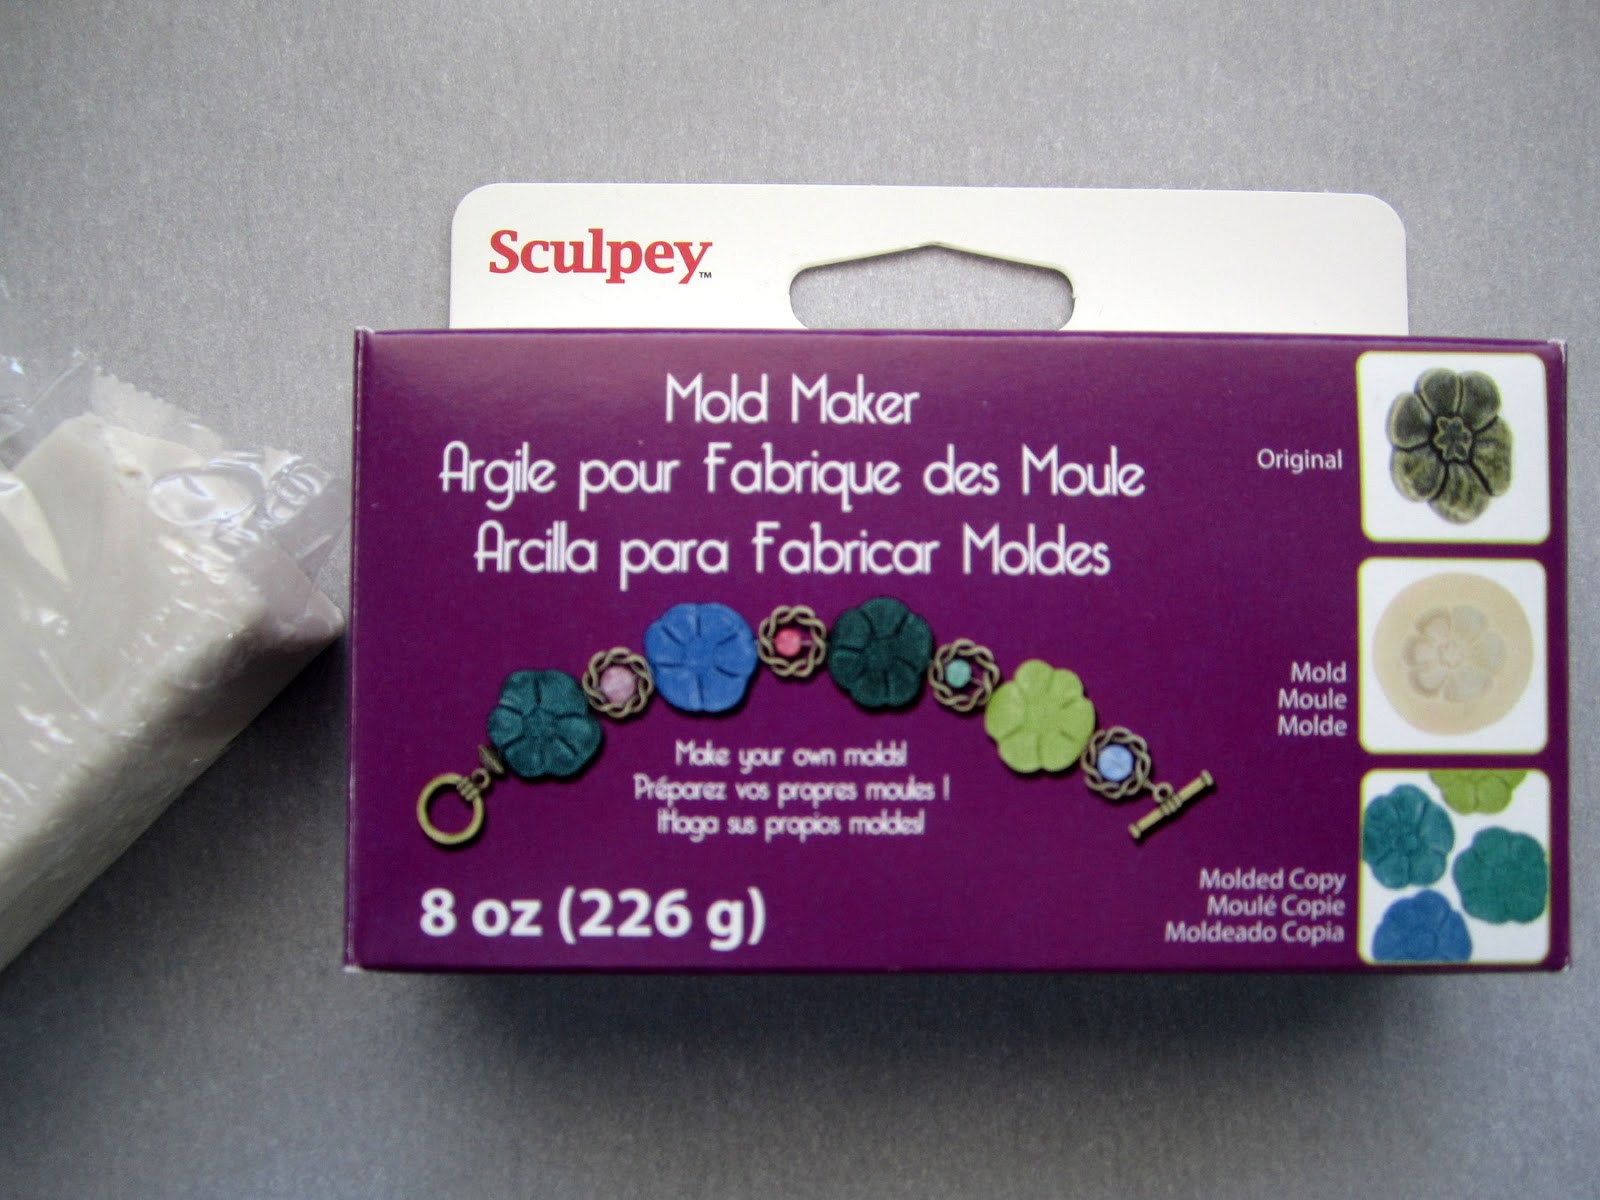
So how do you make a button from scratch? Start by making a mold. The mold material I used is by Sculpey and is called Mold Maker. It's got a consistency similar to clay. It cost about $11 at JoAnn's.
Next, find some buttons or embellishments with distinct textures or deep etchings that will transfer nicely into the molding medium.
Make the mold by flattening out a blob of molding medium into a patty shape. Make sure it's deep enough to accommodate the depth of your button.
Before pressing your button into the molding medium, apply cornstarch or baby powder to your button using a brush (a make-up brush works well). This will make it so that you can pull your button out of the molding medium easier. Coat the button generously.
Press the button into the molding medium. This takes some practice because if you press it in at an angle or go too deep or too shallow, your finished button will reflect those errors exactly! You'll notice also that I decided to make six at once since I'm too impatient to do one at a time. Plus, if you make multiples, you have some leeway if you make a couple of dud's.
Once your molds are done, bake them according to the package instructions (I did mine for 275 degrees Fahrenheit for 20 minutes). After you bake the molds, they will remain flexible so that you can bend them to pop out the clay forms.
At this point, you have two options. You can fill your mold with either air-dry clay that you don't have to bake, or you can fill it with Sculpey clay and bake it. I didn't know if Sculpey baking clay would work or not, but it worked great! And since I am impatient (as established earlier) I like oven-bake clay so I don't have to wait as long for the clay to dry. Just press the Sculpey clay (white in this case, but other colors are fine, too) into the molds. I tried hard to get my clay flat and even with the edge of the mold. If you have too much clay, you'll have a weird lip on the edge of your button and if you don't use enough clay, your button will have a jagged edge.
Note! Tell any hungry husbands or children that these are NOT COOKIES! My cute hubby almost ate one.
Bake these in the oven as per package directions. Just like with the molds, I went with 275 degrees Fahrenheit for 20 minutes. After they're done, let them cool (for my fellow impatient people, you can also put them in the freezer for a few minutes to speed up the cooling process). The molds are flexible, but you may have to bend and tweak some more than others to get the button out. Here they are:
Next you get to color them! I used Tim Holtz Distress ink (Peacock Feathers) and applied the ink with a make-up sponge to get into the crevices.
You could leave it like this, of you could take it a step further and add a metallic tint, which is what I did. I added some black ink, then I rubbed some embossing ink onto the button, sprinkled on some metallic embossing powder and hit it with my heat gun.
You can go as shiny or distressed as you want depending on how much metallic embossing powder you use. Here's an example of three buttons, ranging from using just a little embossing powder to a lot. The more metallic embossing powder you use, the shinier your button will be.
So there you have it! All that's left is to adhere your button to your project!
And what else did I use on my little tag? The fabulous banner is a die-cut from Simon Says Stamp called "Ribbon Banner." The paper is from My Mind's Eye and the tag itself is an actual vintage button card. The stamp set is from Close to My Heart and is called, "You Are..." I finished it off with a fabric strip and some yarn at the top.
So there you go! Is it easy to make your own buttons? Not as easy as buying them, of course, but there is a sense of satisfaction in creating something from scratch. And hey- whatever buttons you make are ALL YOU, so that's got to be worth something!
Here's a tag I created featuring one of these made-from-scratch buttons:
So how do you make a button from scratch? Start by making a mold. The mold material I used is by Sculpey and is called Mold Maker. It's got a consistency similar to clay. It cost about $11 at JoAnn's.
Next, find some buttons or embellishments with distinct textures or deep etchings that will transfer nicely into the molding medium.
Make the mold by flattening out a blob of molding medium into a patty shape. Make sure it's deep enough to accommodate the depth of your button.
Before pressing your button into the molding medium, apply cornstarch or baby powder to your button using a brush (a make-up brush works well). This will make it so that you can pull your button out of the molding medium easier. Coat the button generously.
Press the button into the molding medium. This takes some practice because if you press it in at an angle or go too deep or too shallow, your finished button will reflect those errors exactly! You'll notice also that I decided to make six at once since I'm too impatient to do one at a time. Plus, if you make multiples, you have some leeway if you make a couple of dud's.
At this point, you have two options. You can fill your mold with either air-dry clay that you don't have to bake, or you can fill it with Sculpey clay and bake it. I didn't know if Sculpey baking clay would work or not, but it worked great! And since I am impatient (as established earlier) I like oven-bake clay so I don't have to wait as long for the clay to dry. Just press the Sculpey clay (white in this case, but other colors are fine, too) into the molds. I tried hard to get my clay flat and even with the edge of the mold. If you have too much clay, you'll have a weird lip on the edge of your button and if you don't use enough clay, your button will have a jagged edge.
Note! Tell any hungry husbands or children that these are NOT COOKIES! My cute hubby almost ate one.
Bake these in the oven as per package directions. Just like with the molds, I went with 275 degrees Fahrenheit for 20 minutes. After they're done, let them cool (for my fellow impatient people, you can also put them in the freezer for a few minutes to speed up the cooling process). The molds are flexible, but you may have to bend and tweak some more than others to get the button out. Here they are:
Next you get to color them! I used Tim Holtz Distress ink (Peacock Feathers) and applied the ink with a make-up sponge to get into the crevices.
You could leave it like this, of you could take it a step further and add a metallic tint, which is what I did. I added some black ink, then I rubbed some embossing ink onto the button, sprinkled on some metallic embossing powder and hit it with my heat gun.
You can go as shiny or distressed as you want depending on how much metallic embossing powder you use. Here's an example of three buttons, ranging from using just a little embossing powder to a lot. The more metallic embossing powder you use, the shinier your button will be.
So there you have it! All that's left is to adhere your button to your project!
And what else did I use on my little tag? The fabulous banner is a die-cut from Simon Says Stamp called "Ribbon Banner." The paper is from My Mind's Eye and the tag itself is an actual vintage button card. The stamp set is from Close to My Heart and is called, "You Are..." I finished it off with a fabric strip and some yarn at the top.
So there you go! Is it easy to make your own buttons? Not as easy as buying them, of course, but there is a sense of satisfaction in creating something from scratch. And hey- whatever buttons you make are ALL YOU, so that's got to be worth something!
Thursday, June 20, 2013
Tutorials: Five Techniques to Alter Your Buttons
Buttons are spectacular, are they not? I love how they come in all shapes and sizes these days. And even if you just buy the cheapy plain-Jane buttons, there are hundreds of ways you can alter them to add your own artistic oomph.
Here are five of my favorite techniques for altering buttons quickly and easily:
Stamp on Your Buttons
Stamp an image on your button for a whole new look. This works best on buttons with a flat surface. The one I used was wood. If stamping on a plastic button, make sure that you use an ink that won't rub off.
Paint, Stamp and Ink Your Buttons
Don't like the background color of your button? Add some paint! Before I painted this white plastic button, I sanded the surface to give it some grit for the paint to stick to. After I painted it with acrylic paint, I stamped it with a text stamp and inked around the edges for some added dimension.
Heat Emboss Your Buttons
I absolutely love a vintage metallic look and metallic embossing powder is a great way to achieve it! I rubbed my button on an embossing ink pad, then sprinkled on some metallic embossing powder. I hit it with my heat gun and when the powder melted to the button, I added some brown and black inks on top to give it an aged look. You could also cover the whole thing with metallic powder and if you don't dim it with inks, it'll look like a bright shiny silver button.
Doodle on Your Buttons
Why not draw some squiggles or scenes on your button? I drew a simple wonky spiral shape then painted over it with watercolors. Be sure to use a waterproof ink for your doodling so it doesn't bleed if you add paint or water.
Add Fabric to Your Buttons
You know how much I love fabric! It's easy to cover your button with fabric by tracing your button on a piece of fabric, cutting out the circle and gluing it to your button using a heavy duty glue stick or adhesive of your choice. Poke holes using an awl or other pointy tool.
There are so many ways to spice up those simple buttons! Whip out your tools and give it a whirl! It's a great way to personalize something ordinary and truly make it your own!
Here are five of my favorite techniques for altering buttons quickly and easily:
Stamp on Your Buttons
Stamp an image on your button for a whole new look. This works best on buttons with a flat surface. The one I used was wood. If stamping on a plastic button, make sure that you use an ink that won't rub off.
Paint, Stamp and Ink Your Buttons
Don't like the background color of your button? Add some paint! Before I painted this white plastic button, I sanded the surface to give it some grit for the paint to stick to. After I painted it with acrylic paint, I stamped it with a text stamp and inked around the edges for some added dimension.
Heat Emboss Your Buttons
I absolutely love a vintage metallic look and metallic embossing powder is a great way to achieve it! I rubbed my button on an embossing ink pad, then sprinkled on some metallic embossing powder. I hit it with my heat gun and when the powder melted to the button, I added some brown and black inks on top to give it an aged look. You could also cover the whole thing with metallic powder and if you don't dim it with inks, it'll look like a bright shiny silver button.
Doodle on Your Buttons
Why not draw some squiggles or scenes on your button? I drew a simple wonky spiral shape then painted over it with watercolors. Be sure to use a waterproof ink for your doodling so it doesn't bleed if you add paint or water.
Add Fabric to Your Buttons
You know how much I love fabric! It's easy to cover your button with fabric by tracing your button on a piece of fabric, cutting out the circle and gluing it to your button using a heavy duty glue stick or adhesive of your choice. Poke holes using an awl or other pointy tool.
There are so many ways to spice up those simple buttons! Whip out your tools and give it a whirl! It's a great way to personalize something ordinary and truly make it your own!
Saturday, June 15, 2013
My Cards and Tags: Art Bingo Card
Here's a quick little Art Bingo card I made:
For this card, I used paper from My Mind's Eye, the Paper Studio, Tim Holtz and We R Memory Keepers. Two Prima flowers flank the sides and I wrapped some Moda Dea yarn around one end and stuck a gem from Darice on the other end.
The stamps I used are Tim Holtz's "Odds and Ends" set for the ticket and sentiment, a fairy girl from an Ebay seller who no longer exists (total bummer) and a background wheel/text stamp from TPC Studio.
I finished off the background by punching a scalloped edge using a big bad border punch from EK Success.
For this card, I used paper from My Mind's Eye, the Paper Studio, Tim Holtz and We R Memory Keepers. Two Prima flowers flank the sides and I wrapped some Moda Dea yarn around one end and stuck a gem from Darice on the other end.
The stamps I used are Tim Holtz's "Odds and Ends" set for the ticket and sentiment, a fairy girl from an Ebay seller who no longer exists (total bummer) and a background wheel/text stamp from TPC Studio.
I finished off the background by punching a scalloped edge using a big bad border punch from EK Success.
Tuesday, June 4, 2013
My Other Creations: Fabric Flashcards in SEW Somerset, Summer 2013
Here are a couple of fun Fabric Flashcards I made:
Don't you love that underwear stamp?? I got it from Unity Stamp Co if your stamp collection just isn't complete without some undie's. I sewed around the stamped images, added the word of the object using alphabet stamps and attached it all to a fabric collage. Fun stuff!
Sunday, May 26, 2013
My Cards and Tags: Live, Laugh, Love
It's Memorial weekend and I love this tribute poem by Louise N. Parter that's framed on a plaque at the Theatre Royal in London:
1914–1918
The line hits me the most profoundly is the one that says, "That great company of shining souls who gave their youth that the world might grow old in peace." I'm deeply grateful for those who've sacrificed and who continue to sacrifice so that we can indeed grow old in peace.
One way to show gratitude for those who've given so much is to try and live each day to its fullest. With that in mind, I made this card with the statement "Live, Laugh, Love."
For this card, I used two dies: the fabulous "Ribbon Banner" die (a Simon Says Stamp exclusive) and a Tim Holtz ticket die. I stamped out the shapes with paper from Prima.
I used a scallop circle punch from Stampin' Up! and punched out the circular tokens on a piece of patterned paper by Echo Park. I also inked around all the edges with Tim Holtz distress inks: Walnut Stain, Black Soot, Picked Raspberries and Peacock Feathers.
The "Live, Laugh, Love" sentiment is a stamp from TPC Studio.
I also stamped half a crown on two of the tickets (crown stamp by Heidi Swapp) and cut numbers out of a piece of patterned paper from My Mind's Eye for the 24 and the 7. I added buttons to the top, which I glued some paper circles onto. I used circle punches from Stampin' Up! and ek Success to get the sizes I needed. I added some bows made from embroidery floss. I attached it all to background paper from Pink Paislee and finished it off with a piece of vintage lace at the bottom.
Life's certainly not easy, and I don't know that it's possible to laugh every second, but we can always love and live the very best we can. This Memorial weekend especially, I'm thankful to have that opportunity.
1914–1918
Actors, musicians, writers and workers for the stage who
have given their lives for their country. Honour to the immortal dead,
that great … company of shining souls who gave their youth that the
world might grow old in peace. Their name liveth forever more. These
nobly played their parts, these heard the call for God and King and
home. They gave their all.
Since ye who pass in quest of happy hours
Behold the price at which those hours were bought,
Strew here the fragrance of memorial flowers,
The silent tribute of a grateful thought.The line hits me the most profoundly is the one that says, "That great company of shining souls who gave their youth that the world might grow old in peace." I'm deeply grateful for those who've sacrificed and who continue to sacrifice so that we can indeed grow old in peace.
One way to show gratitude for those who've given so much is to try and live each day to its fullest. With that in mind, I made this card with the statement "Live, Laugh, Love."
For this card, I used two dies: the fabulous "Ribbon Banner" die (a Simon Says Stamp exclusive) and a Tim Holtz ticket die. I stamped out the shapes with paper from Prima.
I used a scallop circle punch from Stampin' Up! and punched out the circular tokens on a piece of patterned paper by Echo Park. I also inked around all the edges with Tim Holtz distress inks: Walnut Stain, Black Soot, Picked Raspberries and Peacock Feathers.
The "Live, Laugh, Love" sentiment is a stamp from TPC Studio.
I also stamped half a crown on two of the tickets (crown stamp by Heidi Swapp) and cut numbers out of a piece of patterned paper from My Mind's Eye for the 24 and the 7. I added buttons to the top, which I glued some paper circles onto. I used circle punches from Stampin' Up! and ek Success to get the sizes I needed. I added some bows made from embroidery floss. I attached it all to background paper from Pink Paislee and finished it off with a piece of vintage lace at the bottom.
Life's certainly not easy, and I don't know that it's possible to laugh every second, but we can always love and live the very best we can. This Memorial weekend especially, I'm thankful to have that opportunity.
Wednesday, May 22, 2013
My Other Creations: Sunshine Girl
I have to say that I am absolutely in LOVE with this "Sunshine Girl" stamp that I discovered from Paperbag Studios. I don't even remember how I stumbled onto this site, but it was a pretty dang good stumble.
Here's a piece of wall art I made using the aforementioned Sunshine Girl stamp and this fabulous "impossible" sentiment stamp from Tim Holtz (Stampers Anonymous). Can we ever get enough Tim Holtz? I think not.
To make this creation, I stamped the girl image onto a piece of patterned paper (Close to My Heart) using black ink (Ranger Jet Black Archival ink). I stamped the image again on a Post-it note, cut around it and put it on top of the other stamped image. Now that my stamped girl was safely covered, I sprayed color mist inks all around her (Heidi Swapp and Dylusions brands).
After that dried and I unmasked the image, I colored her face in with markers (Spectrum Noir) and used pink chalk on her cheeks. I also colored her headband in with some watercolor pencils (Faber-Castell).
Next I stamped the Tim Holtz sentiment onto some My Mind's Eye paper (again with the Ranger Jet Black Archival ink), cut it out, glued some lace behind it, then adhered the whole thing onto background paper from My Mind's Eye and Prima. I finished it off by adding some butterflies using Martha Stewart butterfly punches.
This was a fun project and just the little boost I needed as I recovered from an unfortunate injury. I won't bore you with the details, but suffice it to say that it involved a frozen popsicle and my lips and was very reminiscent of that scene from "The Christmas Story" involving a tongue and a frozen pole. Who knew these things could really happen? Totally not as funny in real life.
Craft on, friends!
Here's a piece of wall art I made using the aforementioned Sunshine Girl stamp and this fabulous "impossible" sentiment stamp from Tim Holtz (Stampers Anonymous). Can we ever get enough Tim Holtz? I think not.
To make this creation, I stamped the girl image onto a piece of patterned paper (Close to My Heart) using black ink (Ranger Jet Black Archival ink). I stamped the image again on a Post-it note, cut around it and put it on top of the other stamped image. Now that my stamped girl was safely covered, I sprayed color mist inks all around her (Heidi Swapp and Dylusions brands).
After that dried and I unmasked the image, I colored her face in with markers (Spectrum Noir) and used pink chalk on her cheeks. I also colored her headband in with some watercolor pencils (Faber-Castell).
Next I stamped the Tim Holtz sentiment onto some My Mind's Eye paper (again with the Ranger Jet Black Archival ink), cut it out, glued some lace behind it, then adhered the whole thing onto background paper from My Mind's Eye and Prima. I finished it off by adding some butterflies using Martha Stewart butterfly punches.
This was a fun project and just the little boost I needed as I recovered from an unfortunate injury. I won't bore you with the details, but suffice it to say that it involved a frozen popsicle and my lips and was very reminiscent of that scene from "The Christmas Story" involving a tongue and a frozen pole. Who knew these things could really happen? Totally not as funny in real life.
Craft on, friends!
Sunday, May 19, 2013
My Other Creations: A Loving Home Collage
One of my favorite blogs to frequent is the Simon Says Stamp & Show blog. Every week, there's a theme-based challenge and then some Mega (with a capital M) talented designers show how they interpreted the theme. And if that isn't enough inspiration for you, there are a ton of entries you can check out left by super crafty people all over the world to show how they've answered the call of the challenge. Needless to say, it is good stuff!
This week's challenge was, "A Little Paper." The goal was to use 6" x 6" paper or cut down bigger paper to make something amazing in miniature. I loved the challenge, so here's the collage I made for it:
To create this project, I made a collage from fabric scraps, then I stamped a house image on top of it. I used the "Elegant House" stamp from B Line Designs and jet black Ranger archival ink.
I attached my house collage to some gorgeous paper from Prima's "Lyric" Collection. I used a piece of 12" x 12" paper titled "Prelude," but I only cut out one tiny panel of it and used that to frame my collage house.
Lastly, I cut out a "Love" sentiment from another piece of paper from this Prima collection titled, "Recital."
I adore 12" x 12" paper and I'm always looking at its patterns and panels and thinking of how I can cut it up into smaller components for cards, tags, mini books, etc. What a fun challenge from the Simon Stamp & Show blog that reminds us that one 12" x 12" sheet can keep on givin' for a multitude of mini projects!
This week's challenge was, "A Little Paper." The goal was to use 6" x 6" paper or cut down bigger paper to make something amazing in miniature. I loved the challenge, so here's the collage I made for it:
To create this project, I made a collage from fabric scraps, then I stamped a house image on top of it. I used the "Elegant House" stamp from B Line Designs and jet black Ranger archival ink.
I attached my house collage to some gorgeous paper from Prima's "Lyric" Collection. I used a piece of 12" x 12" paper titled "Prelude," but I only cut out one tiny panel of it and used that to frame my collage house.
Lastly, I cut out a "Love" sentiment from another piece of paper from this Prima collection titled, "Recital."
I adore 12" x 12" paper and I'm always looking at its patterns and panels and thinking of how I can cut it up into smaller components for cards, tags, mini books, etc. What a fun challenge from the Simon Stamp & Show blog that reminds us that one 12" x 12" sheet can keep on givin' for a multitude of mini projects!
Tuesday, May 14, 2013
My Cards and Tags: May 15th SOUS Card Sketch
Well, it's time for another fabulous card sketch from Stuck On U Sketches. I was not only inspired by Leah's sketch, but I was also ecstatic to play with the new "Find Your Wings and Fly" collection from My Mind's Eye. There's an "Up and Away" set and a "Sky's the Limit" set and they are both dreamy! As always, I get giddy with the latest and greatest from MME.
Without further ado, here's the card I created:
I based my card off this sketch of Leah's, only I flipped it vertically:
All the paper for this card came from My Mind's Eye (as mentioned), except for the text background paper for the stamp, which is from Graphic 45. The stamp of the guy with the crown is one that I bought from a seller on Ebay a few years ago and he's no longer a registered seller (bummer). I also used Tim Holtz distress ink.
Everything else came from MME, including the sticker sentiment.
Without further ado, here's the card I created:
I based my card off this sketch of Leah's, only I flipped it vertically:
All the paper for this card came from My Mind's Eye (as mentioned), except for the text background paper for the stamp, which is from Graphic 45. The stamp of the guy with the crown is one that I bought from a seller on Ebay a few years ago and he's no longer a registered seller (bummer). I also used Tim Holtz distress ink.
Everything else came from MME, including the sticker sentiment.
Thanks again to Leah and the other talented ladies at SOUS. Being on their Design Team has been a completely and utterly positive experience!
Monday, May 13, 2013
Tutorials: Washi Spools
I love to incorporate sewing notions into my projects and I'm especially keen on vintage wooden spools. As I was experimenting with them the other day, I decided to wrap them in Washi tape for a different look. I loved the results! Check them out:
The great thing about this project is that it's super easy and takes about two seconds to do. And if you don't have vintage wooden spools, not to worry! You can also buy craft spools and ink them around the edges to make them appear more weathered.
To do this yourself, you only need three ingredients: Washi, a spool and ink. In my mind, there is no greater ink than Tim Holtz's Distress ink (Walnut Stain color). I use it constantly!
Simply find a Washi that is the same width as your spool (or cut the tape down to size), then wrap a strip of Washi around it, then ink the edges! Done!
For the spools pictured, the floral/butterfly/bird tapes are all Recollections brand. The typewriter tape is from Prima and the diagonal stripe is from My Mind's Eye.
After the spools are covered, you can still wrap a little bit of thread or yarn on top of the Washi for even more dimension. Also, depending on how sticky your Washi is, you may have to add a bit of adhesive to the ends of the tape to ensure it stays stuck for the long haul.
Thanks for stopping by and have fun Washi-ing (If that isn't a verb, it should be)!
The great thing about this project is that it's super easy and takes about two seconds to do. And if you don't have vintage wooden spools, not to worry! You can also buy craft spools and ink them around the edges to make them appear more weathered.
To do this yourself, you only need three ingredients: Washi, a spool and ink. In my mind, there is no greater ink than Tim Holtz's Distress ink (Walnut Stain color). I use it constantly!
Simply find a Washi that is the same width as your spool (or cut the tape down to size), then wrap a strip of Washi around it, then ink the edges! Done!
For the spools pictured, the floral/butterfly/bird tapes are all Recollections brand. The typewriter tape is from Prima and the diagonal stripe is from My Mind's Eye.
After the spools are covered, you can still wrap a little bit of thread or yarn on top of the Washi for even more dimension. Also, depending on how sticky your Washi is, you may have to add a bit of adhesive to the ends of the tape to ensure it stays stuck for the long haul.
Thanks for stopping by and have fun Washi-ing (If that isn't a verb, it should be)!
Subscribe to:
Posts (Atom)