Sunday, February 9, 2014

My Cards and Tags: Valentine's Day

This week's theme at the Simon Says Stamp Monday Challenge blog is "We love stamps!"  A look at my bank statement would confirm that this is definitely true for me! 

One of my favorite types of stamps are people stamps, which I enjoy adding kooky accessories to in order to create new characters to fit my creations.  So here's a Valentine's Day card I made with that suave sophisticated gent from Wendy Vecchi's "Call it Art" stamp set:


Half of the work of this card was already done for me thanks to the Glitz "Birthday Wishes" paper pack, which provided some great background paper to use.  And my guy was easy to color using Spectrum Noir markers.  I wanted to highlight Valentine's Day, so I put a heart around the number 14 on the calendar.  It didn't show up boldly enough, so I cut out another number 14 and glued it on top to make it stand out a bit more.  Then I made a sentiment that says, "He believed in love."


I appreciate the versatility of our leading man and this time I added some glasses and a pointy hat to him.  But that's not his only look!  Just for fun, I went back through my projects and pulled some other versions of him that I've made.

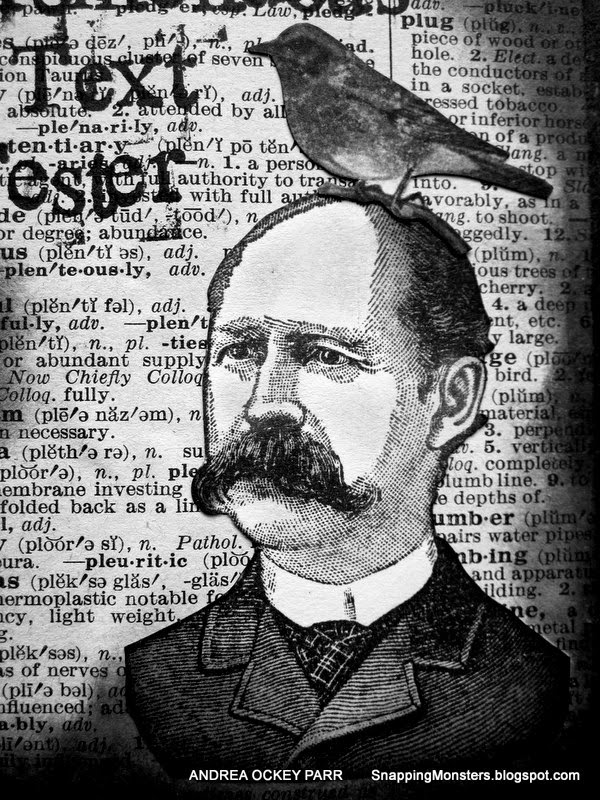
Here he is as a respected scholar, perhaps published in a newspaper with a feathered friend on his head:

 Here he is as an eccentric inventor-photographer:


And here he is drowning in a sea of mathematical numbers and wearing a dunce cap (welcome to my life in junior high and high school, folks! ):


But for now, I really do love my "in love" version of him best!


To make this card, I used the following fantastic supplies that you can get at that store we all know and love-- Simon Says Stamp:


With such an open theme like, "We Love Stamps," I cannot wait to see what you create for this week's challenge!  Remember to share your projects with us on the Simon Says Stamp Monday Challenge blog for your chance to win $50 to spend at Simon Says Stamp!
50dollar_voucher_600px

Sunday, February 2, 2014

My Cards and Tags: Love Letter

Ah, love letters!  Such a perfect theme for February and for us English majors and librarians who go goofy over sonnets and eloquent verse!  So of course, for this week's Simon Says Stamp Monday Challenge, I made a mini love letter with a little Longfellow thrown in.


The Webster's Pages "Postcards from Paris II" line is perfect for all things whimsically romantic.  Their collection includes mini craft bags which make the absolute perfect sleeve for tags.  With these lovely bags already made, half your project is done!

And here's the inside tag, which features the epic words of Longfellow, as promised.  I typed it out on an old typewriter of my dad's to keep with the idea of "love letters" and how people used to actually use typewriters and paper (gasp!) to communicate feelings!


"The dawn is not distant, nor is the night starless; love is eternal."  Can you hear me sighing happily?  This is the quote that my husband and I put on our wedding announcements, so it always has a special place in my heart (as does he-- I'm basically the luckiest woman ever to have him in my life).

I attached the flower to the tag instead of the bag just so that the tag would retain some "visual oomph" when it came out of the bag.  I used the Avery Ellle Embellish It Flower Die to make this rose, which I then glued on top of a Prima flower.  This die is unique in that it presents a new way to assemble 3D flowers (separate petals assembled with a brad as opposed to a long spiral that you twist into your flower shape).


Lastly, you may notice I used a heart pin.  I didn't figure it would be very romantic to have someone get stabbed on my tag, so I always snip off the tip of pins and then sand it down.  It doesn't make the pin totally blunt, but it does help make it safer.

Here are some of the fantabulous supplies I used on this project, which you can get at Simon Says Stamp:


Now I just know that all you crafty folks out there have a multitude of ideas on how to interpret "love letters," so get crafting and submit your creation to the Simon Says Stamp Monday Challenge blog.  Why?  To spread some creative love, of course!  And you could win $50 to the Simon Says Stamp store just by entering.  That's what I call sweet!
50dollar_voucher_600px 

Friday, January 31, 2014

My Cards and Tags: Spring Dress

One of my favorite challenge sites to browse is the Runway Inspired Challenge blog.  It combines two of my loves: fashion and crafting!  When I saw the fantastic floral frock featured (how's that for some alliteration?  Try saying that three times fast!) I knew I had to enter.

And so I created this springy card of my own.  It reflects the lovely bright hues in the inspiration dress as well as the feeling of garden parties and summer outings.


You know I'm a fabric addict, so I made this dress of out fabric strips which I collaged on top of each other.  I smudged some ink over it in different places, attached it to a hanger, added a flower and was done!  I also adore this sentiment stamp (The Ladies Are Going Out) by Inkadinkado.  So many possibilities!
 
Thanks to this challenge which made me think of flowers even as I shiver at the several inches of snow still clinging to my lawn!

Thursday, January 30, 2014

Tutorials: Vellum Feathers

Today I wanted to share a quick and easy way to make vellum feathers, which are all the rage in the industry right now.  Here's the card I made, followed by step-by-step instructions about the feathers:


Start with a white piece of vellum.  Cut out feathers either by hand or by using a die.  I used the fabulous Feathers die from Lifestyle Crafts/We R Memory KeepersI like this die in particular because it has several different-sized feathers on one single die.

Once you've cut out your feathers, use a scoring board to give the feathers a center crease:


The next step is to emboss the edges.  You could use any shade of embossing powder, though I went with silver.  Start by dabbing some embossing ink (I don't think you can beat Tim Holtz Embossing Ink) along the edge and center of your feather, then sprinkle embossing powder over your feather:


Important note!  Vellum is lightweight, so before shooting your feather with a heat gun, grab a heat-resistant tool to hold your feather in place (fingers are not heat-resistant)!   I used a bamboo skewer to hold down the feather while I hit it with the heat gun.

This is where the magic happens!  I love how you can see the embossing powder totally change to a beautiful liquid sheen when heat is applied:

 
The last step is to color your feather.  I like to use wedge-shaped make-up sponges to dab ink onto surfaces like this.  I used Tim Holtz Distress inks and Colorbox inks and blended a couple of different colors onto each feather.

 
And that's it!  I folded the feathers just slightly along the middle crease to make them more dimensional, then I added them to my card and wah-lah!  You have some lovely feathers that will serve as the perfect embellishment for any craft.


Other supplies I used for my card include stamps from Lost Coast Designs (bird), Paperbag Studios (newsprint house) and EK Success (alphabet letters).  The paper is from The Paper Studio, My Mind's Eye and Kaiser.  I also used Ranger Jet Black Archival Ink and Recollections Metallic Silver embossing powder.