Sunday, July 28, 2013

My Other Creations: The Book of Not So Bright Ideas

The setting: junior high art class.  The new kid, Dustin, was trying to pick up some extra income before lunch.  The veteran kid, Rick, was bored.  In a moment that would prove catastrophic for Dustin's nostrils from then on, Rick pulled a vial of Binaca out of his pocket (if you don't remember Binaca, it was this super-intense breath freshener spray).  Rick looked at Dustin and said, "I'll give you a nickel if you spray Binaca up your nose."  As we all shook our heads in the universal sign for "no," Dustin said, "Sure!"  I won't go into the gory details, but Dustin had red eyes and a runny nose for the next two days.  And while I didn't request the extra info, he also said he was pretty sure all of his nose hairs were burned off.  Worth a nickel?  Um, no.

But we humans, because we are humans, do things all the time that are not exactly brilliant.  And so to honor Dustin and myself and everyone else who has done some pretty "duh" stuff, I created this book of "Not So Bright Ideas" in response to this weeks' challenge at the Simon Says Stamp Monday Challenge Blog.


I started out with a tin that had a clear plastic rectangle window on the front.  I cut out the plastic piece and assembled some fabric to use.


I covered the tin with fabric scraps and threw on a few strips of Washi tape for good measure.  I wanted to use a light bulb to symbolize ideas, but since I wasn't celebrating bright ideas, I wanted to make the light bulb look like it was leaking out blackness instead of light.  Using a makeup sponge, I dabbed some StayzOn black ink to the light bulb's surface (StayzOn is made for non-porous surfaces, including glass).  Then I took Heidi Swapp's Black Velvet Color Shine Spritz and sprayed a blob of it behind where my light bulb would go.


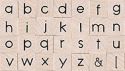
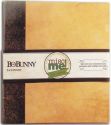
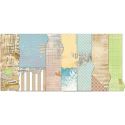
I adhered the light bulb to the tin and let it dry.  I tore off some background fabric scraps and adhered them to a blank Bo Bunny "Miscellaneous Me" collection binder.  I cut out some tickets from the My Mind's Eye "Find Your Wings and Fly" collection, then used alphabet stamps to spell out the book's title.  I accented the tickets with paperclips.


I also added a "secret message" to the inside of the tin that can open up like a little door.

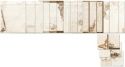
As for the inside of the book, there are so many non-bright ideas to choose from that it's hard to know where to begin!  I decided to start with the bad idea that inspired this project: my friend who ate an egg that was fried by a street vendor on a downtown sidewalk where thousands of feet (some bare) walk everyday.  Not that I'd want to eat a sidewalk-fried egg under any circumstances, but a downtown sidewalk just up's the ick factor by about 200%.  My friend was sick for days, so here's the page I created to honor him:


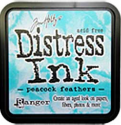
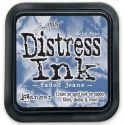
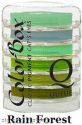
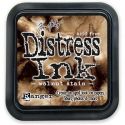
There are more details to the story, of course, but I didn't want to shame my friend so blatantly on the internet, so I just shown here the main page without the journaling on the back.  I used ink, paint, fabric, stamps and yellow ink spray to make the center look a little like a spilled yolk.  Here are some of the supplies I used that you can get at Simon Says Stamp:


I'm already thinking of the next pages, all inspired by my own or my friends' stupidity: testing the sharpness of an electric razor on your tongue, eating an entire bag of jalapeno Jelly Belly's before riding the roller coaster, trying on a pair of your grandpa's prescription glasses and then walking down the stairs...let's just say I left plenty of blank pages!

The Simon Says Stamp Monday Challenge Blog never ceases to inspire.  And you could win $50 to the Simon Says Stamp store just by entering your inspired creation!  Give it a try because that would be a very bright idea.

50dollar_voucher_600px

Saturday, July 27, 2013

My Cards and Tags: Soar

It's always toasty in my neck of the woods in July, but this morning the air was downright muggy and still; as though waiting to either explode into a storm or just hang out in gray monotony.  It's still in a holding pattern.  But I have to give kudos to the weirdly mysterious air because it did inspire me to create a card using this fabulous hot air balloon stamp from Tim Holtz.


I stamped the balloon image on several pieces of patterned paper, then cut out the different sections of the balloon and pieced them back together.  The paper I used is from My Mind's Eye, Simple Stories, K & Company, Graphic 45 and Jenni Bowlin. 

I added some Washi tape to the background from Recollections and My Mind's Eye, then stamped the "Soar" sentiment using alphabet letter stamps, also from Recollections.


Whether the weather decides to go crazy or stay mellow, I'm glad that the overcast mood inspired me to try and "soar above it" (ha, ha) with this card.

*Interesting side note: not sure where the "water squirrel" word combo came from on the text background paper at the bottom of the card, but it sure made me wonder about the rest of the story!

Sunday, July 21, 2013

My Other Creations: Fabric Mache Cupcakes

No matter how old you get, there always seems to be something soothing about goo: aloe on a sunburn, stringy cheese on pizza, a mud mask, and of course, paper mache paste!  I daresay these goos are therapeutic.  So when the Simon Says Stamp Monday Challenge blog issued a "celebrate" theme for this week, I decided to combine some of my favorite celebratory things: cake, fabric and goo.  So wah-la!  Behold my paper mache'd cupcakes!


These are not too hard to make, especially if you start out with these pre-made cardboard cupcake boxes like I did.  I've seen them at both Michaels and JoAnn's.  Fist, paint them with white acrylic paint.  Next, rip up all sorts of fabric scraps then mix up a batch of Golden Harvest Universal Wheat Paste (it's basically fancy paper mache mix that smells pleasant).


Just like those happy pinata-making days of childhood, submerge your fabric scraps in the paste and smoosh them onto the cupcake form.  Be sure to cover your work surface before you start!  When it's done, it'll look something like this:


The texture, as you can see, is wet and glossy.  Once it's dried, it will look like this:


If you want to get a more "ragged" look in some places (as opposed to the glued-down look), you can still glue scraps to your cupcake after it dries.  And this is when you get to add a ton of dimension and oomph with ink!  Any ink seems to work just fine, but Tim Holtz distress ink works especially well.  I also used Colorbox chalk ink and I applied all of it with a make-up sponge.


Once you've added ink, you're ready to embellish!  Glue on flowers, lace, stamped images or whatever else your little heart desires.  Here are how the other two of my trio turned out:


The quote on this one, "There is never an awkward time for cake," is a totally classic one-liner I heard my boss say after cake was distributed at the end of a staff meeting that had gotten a bit heated.  My boss was absolutely right: cake = peace.


This was such a fun project and Simon Says Stamp is a fantabulous place to get all sorts of crafty supplies in one go.  Here is what I used to bring my cupcakes to life:


Remember that you can enter the Simon Says Stamp Monday Challenge every week yourself!  You could win $50 to Simon Says Stamp!  Just upload your project that follows the weekly theme and you're entered in.  Wa-hoo!  And hey-- inspire others with your cool projects at the same time.  It's a win-win...kind of like cake and goo.
50dollar_voucher_600px

Saturday, July 20, 2013

My Cards and Tags: True to Herself

I was totally sucked in to Julie Nutting's art style when I first saw it, so I was excited when she released her stamp line (via Prima) so that all of us could easily create some classy ladies!  Here's a card I made using one of her amazing mixed media girl stamps:


I made the dress out of fabric scraps and added some Washi tape to the background for even more visual interest.  I also used chalk to color in the girl's skin and hair and rosy cheeks.  All the paper I used is from a collection by DCWV called, "The Primrose Stack."  I dig the romantic pastels and soft images it has.


Lastly, I finished off the card with a great sentiment stamp from Unity Stamp Company ("She remained true to herself").  I love that saying because it reminds me to live up to whatever I hold most dear and to not waste energy trying to be someone else.  Not easy, but so vital! 

Tuesday, July 16, 2013

My Cards and Tags: Summer in Winter

When I made this tag today, I wanted to celebrate all those people out there who are fighting against unbelievable odds and still manage to somehow lift the rest of us.  They inspire simply by keeping the faith when its seems nearly impossible to see light anywhere.  These people are precious to my soul and they truly have the ability to "maintain a kind of summer even in the middle of winter."


The stamp of the woman was so thought-provoking and perfect for this project.  It's from B Line Designs and is called "Anticipation."

I used a large tag from Prima for the background, painted a bit of Gesso on it where the woman's image would go, then stamped her on the tag.  I then covered the woman and stamped a circular pattern on the background with Tim Holtz Peacock Feathers distress ink and a homemade circle stencil.  Then I sprayed the top of the tag with Heidi Swapp Black Velvet color spray and Dylusions London Blue ink spray.


When it was dry, I unmasked the image and painted the woman's clothes with watercolors.  I used chalk to color her skin.  I used acrylic green and yellow paint to color the rest of the tag, then I added the fabulous sentiment from Thoreau at the bottom (a stamp from Inkadinkado).  I finished the tag by adding yarn from Crystal Palace at the top.

I hope this tag looks like what I was trying to convey, which is hope standing strong in the heart of dark days.  We all have dark days, but I truly am grateful for those who have taught me to never lose sight of the sunshine.

Monday, July 8, 2013

Tutorials: Quick Image Flip Stamping Technique

Okay my fellow stamp hoarders: we know our stashes are splendidly plentiful, but despite all our resources, we occasionally still need to change one of our stamps to get just the look we need.  One great way to add even more versatility to our stamps is to create flipped images from them.  Say you have a hand stamp that's pointing left and you need it to be pointing right, or maybe you have a pencil sharpener stamp that fits better on your project if the handle's on the other side.  Here's a quick and easy way I figured out to flip your stamped images:

Here's what you will need: a stamp, an acrylic block or piece of wood, some 3mm or thicker craft foam and/or red rubber, ink and some saran wrap (or cling film-- whatever you choose to call it).


The first step is to make a "sandwich" on top of your acrylic or wooden block.  Put the block on the bottom, then put a square of red stamp rubber, then add a square of craft foam (just the cheap kids' craft foam that you can get at Michaels, JoAnn's, etc.).  If you don't have any red stamp rubber, I'm guessing that two squares of craft foam would work just as well.  The point is to get a sproingy squishy surface.


The next step is to practice your deli skills and wrap this thing up nice and tight with saran wrap (cling film).  I didn't use tape or anything; I just wrapped it all the way around so the saran wrap stuck to itself on the back.  Make sure that your saran wrap surface on top is wrinkle-free because this is where you'll be stamping your image.


Now you're ready to stamp onto your saran-wrapped surface!  I tried several different inks and had the best luck with Ranger Archival ink since it's pretty juicy.  You can use other kinds, but the image was lighter and fuzzier with the other inks I tried.  Stamp your image onto the saran-wrapped top of your sandwich.


Now treat this as you would a normal stamp: press it down onto your paper.  Use those muscles and rock it back and forth slightly for maximum image transfer.  And wah-la!  Here's how it turned out as I lifted the stamp off my page:


So there you have it!  An image flipped the opposite way.  And the best part is the clean-up: simply peel off your saran wrap and your rubber/foam squares are good to go for another day.


So how does our flipped image compare to the original?  Here's a side-by-side comparison.  The one on the left is the one we flipped and the one on the right is the original stamped image.


The one on the left will never be quite as crisp and dark as the original because you're stamping it twice instead of just once: you have to stamp to the saran wrap, then stamp from the saran wrap to the paper.  But hey- I thought it was pretty darn good replica if I do say so myself.  

There are probably several more genius ways to go about this, but all in all, I was pleased with the results.  So if you've desperate to have an image face the other way, look no further than your kids' craft foam collection and your pantry!

Wednesday, July 3, 2013

My Cards and Tags: Dream in Color

As many of you may know, math is NOT my forte!  So when I saw this vintage math flashcard, I decided right away to cover up any evil reminders of subtraction.  I collaged until I could collage no more and this is the final result:


So here is how I created this math-less wonder.  I started by covering some of the flashcard with Washi tape so that there would be some blank spots left when I painted and peeled the Washi off.


Next I covered the flashcard with this fabulous stencil (Show Offs brand?) that I got at Hobby Lobby.


I used some cheapy acrylic paint on a sponge brush and covered the stencil and flashcard surface.


I peeled off the stencil and the Washi tape.  I then applied some Tim Holtz Distress Ink (Picked Raspberry) and Colorbox ink (green) with a make-up sponge to add color to the blank spots.


Next I added several strips of Washi tape to give some pattern and dimension to the background.


For the focal point, I used this fantastic girl head stamp (called "Pigtails") from Paperbag StudiosI stamped it and cut it out, then made a dress for our lovely girl.  I added a sign with "She dreams in color" made using various alphabet stamps.


I punched a hole in the top of the flashcard and added some yarn.  As a final touch, I glued some flowers to the yarn.


This tag was fun to make and I felt an odd sense of freedom as I covered up all the remnants of math.  Subtraction was always tricky (especially when a zero is in the number on top), so I'm glad our little tag girl triumphed in the end!