Tuesday, December 31, 2013

My Other Creations: Encouraging Bird Collage

Though we're still enjoying a holiday break from "official challenges" here at the Simon Says Stamp Monday Challenge blog, we were asked to share some of our "old favorites"-- you know those go-to products we love?  Of course I went straight for this Tim Holtz quote stamp: "It's not who you are that holds you back; it's who you think you are not."  You've seen me use this stamp a thousand million times yet I never get tired of it.  Another favorite is the bird stamp set from Dylusions.  So I combined them both to make this little fabric collage:

 
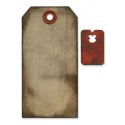
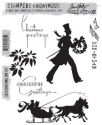
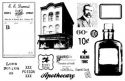
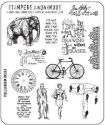
You may notice that my sentiment stamp doesn't look like the one in the set.  One thing I tend to do with sentiment stamps is to cut them up so that I can rearrange the spacing of the words to fit any project.  That's what I did with this one.  It can be scary to take scissors to your stamps, but it does offer more possibilities!
 
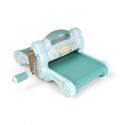
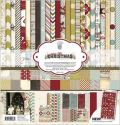
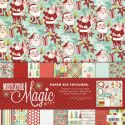
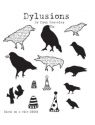
Here are some of the products from Simon Says Stamp that I used for this project:


 Keep posted because our regular Simon Says Stamp challenges are about to resume and I can't wait to see what masterpieces you've created!
http://www.simonsaysstamp.com/servlet/StoreFront


My Cards and Tags: Envelopes Using the Envelope Punch Board

I thought I'd ring in the new year with a fun envelope using the fabulous Envelope Punch Board from We R Memory Keepers/Lifestyle Crafts.  I've posted about this gem of a tool before, but I'm posting about it again because it truly is a fantastic way to make customized envelopes such as this one:


The thing I like about this punch board is that the instructions are written on the board!  That's a nice feature for people like me who tend to misplace instructions!  This tool also has a spiffy dual-punch that punches out indentations and also punches rounded corners.  It's got everything you need to make envelopes of all sizes.


Once my paper was punched, scored and folded, all that was left was to decorate it.  This man stamp is from Paper Artsy.


I also added on these great sticker stamps from K & Company and stamped some postmarks on top of them.  I made a subtle polka dot background and added some cursive text then marked out an address with alphabet stamps.


This envelope was highly entertaining to make and bonus points go to you if you know where the name and address on the letter are from (best movie EVER)!  And hey- if you haven't checked out the envelope punch board yet, I do highly recommend it!

Sunday, December 22, 2013

My Cards and Tags: Tim Holtz Caroler Holiday Tag

Ah, Tim Holtz!  He's done it again with tons of new yummy holiday stamps and dies.  His products are always so easy to incorporate!  I know that the Tim Holtz creations my fellow Design Team members made at the Simon Says Stamp Monday Challenge blog have been fantastic!  Here is the gift tag I came up with using one of Tim's new dies and stamp sets:


This tag could be called a "scrap tag," which is where you try and use up those eighty-billion holiday paper scraps that are left over from bigger projects.  Here are the scraps I had, some of which I cut into tag-shapes:


I experimented by layering the different components on top of each other until I got a look that I liked:


Once my base was made, I glued the layers together and added some embellishments.  To attach the tag to my gift, I wrapped the gift box (covered in brown paper) with bakers twine, then clipped the tag to the twine like so:


The last step was to stamp "Christmas" onto the happy caroler!


Scrap tags are a great way to reduce that leftover holiday paper stash and really liven up ordinary wrapping. 

Here are the products I made this tag with, available from Simon Says Stamp:


Happy holidays to you and yours and I can't wait to see what amazing creations we all come up with in 2014! 

Sunday, December 8, 2013

Tutorials: Tissue Paper Pendants

This week's theme at the Simon Says Stamp Monday Challenge blog is to create something fantastic using tissue paper!  After all, we have plenty of the stuff flying around this time of year, so we may as well whip it up into a project.

I decided to continue my ICE Resin experiments and made these tissue paper pendants which I then turned into this necklace:


I've said before that I'm a firm believer in jewelry never being too big, bold or crazy, so I made plenty of these pendants to go around!  I was intimidated to try them at first, but once you get going, they're not too hard at all.  Here's how I made them:

Start with some craft or jewelry wire.  I used two different gauges of wire and if you look closely you can see the differences in wire thicknesses.  With wire, the thicker it is, the lower the number.  So 16-gauge wire is thicker than 20-gauge wire.  That seems counter-intuitive to my brain, but I also flunked math, so I can't really talk.

I used a nice chunky wire (purchased at Jo Ann's) and it did make it easier to adhere the tissue paper to it because there was a thicker "base." 


Bend the wire into whatever shape you want your pendant to be.  Remember to leave a long "tail" poking out the top so you can twist it onto a chain later.


Lay your pendant loop on top of tissue paper.  I used Tim Holtz's pre-printed "Melange" tissue wrap, but you could use any type of tissue paper, patterned or plain.  Using a pencil, trace your pendant shape onto the tissue paper.


Cut out your tissue paper shape.  Now this is where you can add color or other stamping if you want to.  I used Tim Holtz's Picked Raspberry distress ink to add some pink to my tissue paper.  I then stamped on a "Love Potion #9" sentiment from Artistic Outpost using StazOn black ink.  I didn't care if the pink smeared or bled when I added resin, but make sure to use a permanent ink for any  image or sentiment that you want to "stay put" once you add liquid.


After your ink dries, get out your rubber gloves and mix up some resin!  For this project, a little resin goes a long way, so only mix a small amount to avoid wasting it.  You can buy mixing containers or you can use a disposable plastic cup that you've cut the top half off of.  You can use a Popsicle stick to stir it with.  I would also recommend working over parchment paper or waxed paper for easy clean-up.  Once your resin's mixed according to package directions, dunk your tissue paper into the resin or drizzle resin from the container over your tissue paper.  Smear it all over your tissue paper with your fingers and work the resin into your tissue paper.  Think of it like paper mache only you're using resin instead of flour/water goop to coat your paper with.


Now that your tissue paper is completely coated and saturated with resin, lay it down on your wire form.  The resin that you've put on the tissue paper will stick to the wire and hold it in place.  It doesn't matter if the tissue paper overlaps the wire a bit because it just adds to the quirky whimsical look.  Now you just have to let it dry and you're done!  It will have a translucent shiny look to it when it's dry and you can attach your pendant to anything you want.


In the example above, the wire isn't as obvious because I laid the tissue paper on top of it.  On the necklace I made, I flipped some of the pendants over so the "wire frame" showed up more.  Either way looks good (in my opinion).


I'm still a novice at all of this resin stuff, but Susan Lenart Kazmer's book called Resin Alchemy makes all things seem possible.  It's fact-filled and reassuring, which I appreciate!

You may also notice some pendants that have colorful butterflies, etc. That's actually some Washi tape that I was experimenting with and which seemed to work nicely, too, since it is sort of transparent like tissue paper.  I also stamped some random images here and there in addition to the patterns on the tissue paper.


All in all, this project was a fun one to try out.  Here are some fabulous supplies available from Simon Says Stamp that can make this creation possible:


So what are you going to do with tissue paper this week?  It's a busy time of year, but I hope you'll share your brilliance on the Simon Says Stamp Monday Challenge blog!  After all, what would be a better holiday treat than $50 at the Simon Says Stamp store just for you? 50dollar_voucher_600px