Sunday, August 31, 2014

Tutorials: Stamping on Paper Towels

Welcome to the Stamptember Celebration at Simon Says Stamp!  


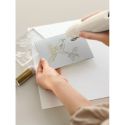
Our celebration starts with the Simon Says Stamp Monday Challenge theme of being BOLD with our stamping (use bold colors, a big bold stamp, etc).  I decided to boldly stamp where I'd never stamped before: on paper towels!  But it was only fun when I added water...and that also kicked up the "not a conducive material to work with" factor.  So I will show you what I did to make this collage, but quite honestly, there may be much easier ways to achieve this visual effect!


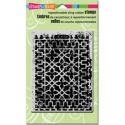
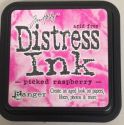
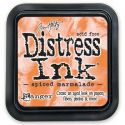
I started by dabbing different colors of Distress Ink on this background stamp (Decorative Grate by Stampendous) and stamped it on my textured paper towel.


I spritzed the stamped area with a good amount of water, which caused the colors to spread and bleed together.  The longer you leave it, the more the colors will spread out.  It will also turn more "pastel-y" (totally not a word) as the intense color dissipates.


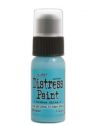
Before it completely dried, I dabbed on some Distress Paint to give it more variety (Distress Paint has a bit of a "chalky" look to it when wet). 


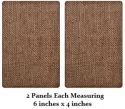
Once my paper towel dried, I added some light teal polka dots and adhered the paper towel to a burlap panel using Gesso.  I kept forgetting that my paper towel would be hard to work with every time I added something liquid-based.  I found that Gesso and paper towels don't really mix, but modeling paste and paper towels REALLY don't mix!  I smeared some modeling paste through a Tim Holtz latticework stencil and had to gently (emphasis on gently) pull the stencil off my paper towel surface. 


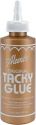
I used Distress Paint to color the modeling paste.


Because I hadn't been challenged enough by paper towels yet, I decided to try and punch some shapes out of my excess colored paper towel scraps.


I can't say I'll be using a hand punch with paper towels again anytime soon, but I do like how these tattered flowers turned out.  I adhered them to my background.


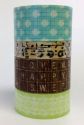
From here on out, it was just a matter of filling in my canvas.  I did an image transfer onto fabric and adhered it to a vintage dictionary scrap page.  I added a hat and some Washi tape and made the sentiment, "Go and Do."

   
The phrase "Go and Do" has special meaning to me because I'm the type of person that dreams big and plans big, but who doesn't always take action.  So I try to remind myself to not only dream, but to go and do something about those dreams.

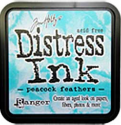
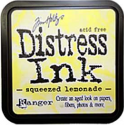
Here are some of the products I used from Simon Says Stamp to create my piece:


What will you go and do to be bold with stamps this week?  I can't wait to see your creations, which constantly amaze and inspire me.  Plus, when you upload your creation to the Simon Says Stamp Monday Challenge Blog, you'll be automatically entered to win the drawing for a $50 voucher to Simon Says Stamp.  That's a win and win!


http://www.simonsaysstamp.com/

Saturday, August 30, 2014

My Cards and Tags: Beautiful You

What a fun weekend I've had playing with the stamps I ordered from 100 Proof Press!  Here's a tag I made using their Danita Angel, Big Bunch O' Buttons and Beautiful You stamps:


I made the background by stamping the button image onto these great newsprint-looking tags from American Crafts (DIY Shop collection).  Then I whipped out my watercolors and started painting each button:


As I painted, I tried to blend the colors by dragging some of the paint from one button to another:


I liked the look and may leave the white next time, but since I wanted my light-colored central image to stand out, I colored in the rest of the background with corresponding shades of ink (dabbed on with sponges).


All that was left was to stamp and cut out my angel girl and attach her with pop-dots for a more dimensional look.  I gave her cheeks some rosiness with chalk and added a camera for her, which I cut out of a strip of Washi tape (Spare Parts brand).


I added the Beautiful You sentiment to the bottom and a butterfly to the top corner (also cut out of Spare Parts brand Washi)

I always enjoy making tags because their small size doesn't overwhelm.  So many fun possibilities without the emotional trauma of staring down a blank 12x12 piece of paper!

Tuesday, August 26, 2014

Tutorials: Fish Gift Tags

I have to admit that while I don't consider myself to be a "fish person" (not super keen on eating it, smelling it or killing it), I do adore this Life-Size Bluegill stamp from 100 Proof Press.  Its hefty size (4" x 6 1/4") makes it full of potential!  I decided to make two dandy gift tags with it:


While I kept the color palette and basic structure the same for both tags, the stamping inside the fish is different.  As you can see in the picture below, the first fish is made strictly with the fish stamp as it comes (very life-like and detailed with gills and fins).


For the second tag, I got a little crazy and only inked the edges of the fish stamp then filled it in with other 100 Proof Press images (Profit and Loss Sheet and Screen Texture).


Whichever you prefer, the process for making the collaged patterned paper background is the same for each fish.  In this tutorial, it shows my process for the second fish.  The patterned paper I'm using is from The Paper Studio (available at Hobby Lobby), My Mind's Eye and Prima.

Stamp the image onto a background piece of patterned paper (I used Ranger Jet Black Archival ink).  It doesn't have to be perfect everywhere because the majority of it will be covered with the patterned paper collage.


Stamp the image a second time on a piece of scratch paper (I used a piece of typing paper).  Again, we're not going for perfection here.  We just need a basic outline so we'll know where to cover it with paper scraps.


Now start building up your collage by gluing scraps of patterned paper onto your white paper.  You don't have to cover it totally because you can later cut off the white parts and that will be where your background patterned paper will show through.


When your collage is done, stamp on top of the collage.  It doesn't have to line up perfectly with the fish that was stamped on the white paper because we're cutting off the white part anyway.  You just have to stamp the fish in roughly the right place on top of your patterned paper.
 

Cut around the fish image and discard the portions where it's just stamped on white.  Now you have your patterned background and the collaged part you just cut out. 


Here's where the magic happens!  Put adhesive on the back of the collaged portion, line up the stamped lines, then glue it on on top of your patterned background.  Wah-la!


Now that your collaged fish is made, all that's left is to add ink around the edges (Black Soot Distress Ink) and to add more stamping to the fish's body if you left it open.  I always dab on more Distress Ink with a sponge, too, to help everything look blended.  On these fish, I used Peacock Feathers, Picked Raspberry, Spiced Marmalade, Squeezed Lemonade and a set of green inks from Colorbox called Rainforest.  I drew a hat and a crown and added them on, along with sentiments made with alphabet stamps from Recollections (available at Michael's).  It took me a while to dig out my old eyelets, but I finally found them and attached them to my fish using a Crop-A-Dile.  I finished them off with a Christmas ornament hook.  Initially, I was going to put the hook in their mouth and hang them vertically, but they turned out so cute that I didn't want them to look dead!

Kudos again to these great stamps from 100 Proof Press that made my fish tags possible!