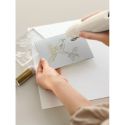
There's no better theme for a Simon Says Stamp Monday Challenge than "Anything Goes." And since the creative field is wide open, I went with one of my favorite mediums: fabric! This week I made a magnetic inspiration board.
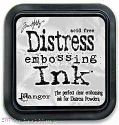
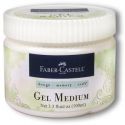
This is made with fabric scraps and is stamped with Distress Inks and gesso. I even did some heat embossing with some subtle white patterns. Here's a closer look:
And can you ever use too many Prima flowers? I attached this one to the side to remind me that Spring (hopefully) isn't so far away after all!
Magnetic inspiration boards are a great way to keep yourself surrounded with beautiful things (as well as keep organized). I finished it off with a white frame and it now hangs on my craft room wall to remind me of all things lovely.
To make my project, I used the following products available from Simon Says Stamp:
With a theme of "Anything Goes," I can't wait to see what marvelous creations you come up with this week! Be sure to upload your projects to the Simon Says Stamp Monday Challenge Blog for your chance to win a $50 to the Simon Says Stamp store.
Sunday, March 30, 2014
Friday, March 28, 2014
My Cards and Tags: Farmer's Market Cards
I would love to spend hours and hours happily crafting. But alas! My days seem to have less and less minutes and more and more mundane tasks (I'm talkin' to you, dusty surfaces)! Sometimes you just have to make quick creations. But the good news is that there are so many easy-to-use products out there that allow us to still be original, but within a speedy time frame.
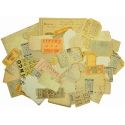
There are a lot of great paper packs that come with paper, ephemera, stickers and sentiments. One charming little collection I've discovered is We R Memory Keepers' Farmer's Market line. Here are two quick and easy cards I made with this set:
The thing I like about the We R Memory Keepers paper packs is that the paper is very sturdy and many of their kits come in a handy dandy plastic boxes for easy storage.
So check out what's new with We R Memory Keepers and Lifestyle Crafts if you're in the mood for some great new products for Summer!
There are a lot of great paper packs that come with paper, ephemera, stickers and sentiments. One charming little collection I've discovered is We R Memory Keepers' Farmer's Market line. Here are two quick and easy cards I made with this set:
Don't those colors and patterns make you feel like Summer is just around the corner? We had pea-sized hail here yesterday, but I'm holding out hope for daffodils and daisies soon!
The thing I like about the We R Memory Keepers paper packs is that the paper is very sturdy and many of their kits come in a handy dandy plastic boxes for easy storage.
So check out what's new with We R Memory Keepers and Lifestyle Crafts if you're in the mood for some great new products for Summer!
Sunday, March 23, 2014
My Other Creations: Transparent Party Favor Box
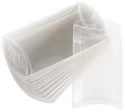
The theme for this week's Simon Says Stamp Monday Challenge is "transparent." I went right for these clear plastic pillow boxes to see what I could do with them. I decided to decorate them and fill them with crafty goodies for my friends who enjoy creating wonderful works of art.
These boxes are completely different styles and that's because my artsy friends all lean toward a different aesthetic. So I experimented with a couple of diverse looks.
For the pink box, I stamped a Wendy Vecchi image onto the front with embossing ink, added white embossing powder, then shot it with my heat tool.
Caution! We all know that heat and plastic don't mix unless you're trying to do something melty!! This was a risky maneuver. My plastic box was milliseconds away from being a deformed transparent blob. I don't know if you ever get adrenalin rushes from crafting, but this was one for me! Will I or won't I destroy this plastic box?? But I survived and so did my project...this time. So if you do try and heat emboss onto plastic, my only advice would be to keep your heat tool moving around fast-- like warp speed! If you heat up one spot for too long, disaster will surely ensue.
I topped off my box with some pink and white yarn and some Tim Holtz "Tattered Florals" daisy shapes that I cut out of used dryer sheets.
And for you extra inquisitive folks, here's a peek of what I put inside the box:
For the grungier box, I went a safer route and stamped directly onto the plastic with StazOn inks (no heat involved). I used a polka dot stamp for the teal dots, then I used a sponge to dab brown around all the edges.
After that, I added some Washi tape and fussy cut around some stamped images, which I glued to the box. I filled this one up with vintage dictionary pages, ticket stubs and other paper ephemera.
The great thing about these pillow boxes is that they are so incredibly versatile! And they come flat, which makes them easy to stamp on and decorate.
I was able to create these boxes using the following supplies from Simon Says Stamp:
So what transparent masterpieces will you create this week? Please do share your creations with us on the Simon Says Stamp Monday Challenge Blog. As always, you will inspire us and you will enter yourself in a random drawing to win $50 in Simon Says Stamp store credit.
Subscribe to:
Posts (Atom)