Sunday, October 26, 2014

My Cards and Tags: Eye of Newt Test Tube and Tag

Halloween is only days away and the Simon Says Stamp Monday Challenge Blog's theme is, "This is a Treat."  So what's my treat?  A necklace pendant of newt eyeballs on a spook-tacular tag.


If you're feeling like you need an eyeball jar pennant, here's how I made it:

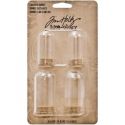
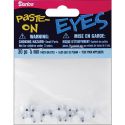
Start with a Tim Holtz apothecary jar and some plastic eyeballs (I used 5 mm size).  In order for the eyeballs to look realistic from any angle, glue two eyeballs back to back.  Warning!  The patience level needed for gluing tiny eyeballs back to back is HIGH!


While the glue on your eyeballs dries, make a label for your test tube.  When your eyeballs are dry, load them into your test tube and prepare the cork topper by inserting a head pin up through the bottom of the cork.  Add a decorative cap or bead to the top, then bend the pin into a loop with some pliers.  Glue the cork in place so no eyeballs go AWOL.


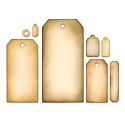
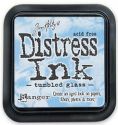
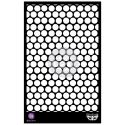
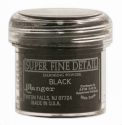
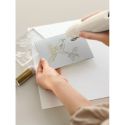
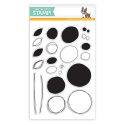
I made the tag by smearing on some various shades of Distress Ink, then made circles with a black Sharpie and a Prima stencil.  I added some black watercolor dribbles coming out of the black circles.  I heat embossed a spiderweb onto the tag with black embossing powder and a stamp from Tim Holtz's Mini Blueprints stamp set.  I added some yarns and fibers to the top of the tag and a "For You" sentiment.


Thread your eyeball test tube through a necklace chain, attach it to the tag and you've made the perfect Halloween treat!

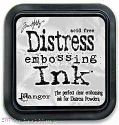
Here are the supplies I used, which you can find at Simon Says Stamp:


So what treats will you come up with for this week's challenge?  I can't wait to see your treaty-genius in action!  Upload your projects to the Simon Says Stamp Monday Challenge Blog and you'll automatically be entered to win a $50 voucher to Simon Says Stamp.  Now that's what I call a treat!

http://www.simonsaysstamp.com/

Thursday, October 23, 2014

My Cards and Tags: The Princess and the Pea

I combined two of my favorite go-to products to make this mini card: the Little Red Riding Hood stamp from 100 Proof Press and the 3x4" rounded-corner card punch from We R Memory Keepers.


I made this card by starting with white watercolor paper, which I cut into this handy-dandy shape using the 3x4" punch mentioned above.  I then sprayed it with Dylusions ink (Fresh Lime and Lemon Zest) and let it dry.  I stamped the background with a Large Handwriting stamp from 100 Proof Press, which I stamped vertically, using Ranger Jet Black Archival ink.  Next I smudged on some Distress Ink (Worn Lipstick and Tumbled Glass) and dripped some different shades of watercolors down the top.


I stamped Red Riding hood and paper-pieced her together.  I made a pointy hat for her and a crown (cause you can't have too many things on your head at once, right?) and I attached a Simon Says Stamp die-cut cloud bank image behind her.  I gave her a pea and added the text, which I stamped with alphabet stamps from Studio G.  To finish it off, I gave the card a little swirly curl of embroidery floss at the top.


I thoroughly enjoyed making this project and it's funny where inspiration comes from.  This card was a result of a debate my husband and I got into about how the story of the Princess and the Pea went and whether or not it had a point.  So hey- if you need an idea for a project, look no further than a random conversation!
Wednesday, October 22, 2014

Tutorials: Tips for Drips and Splatters

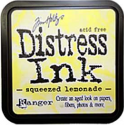
I'm still getting my spook on this month and made this tag using a few different techniques for making drips and splatters.


If you want to see my tutorial on how to make this splattery splotchy background, as well as see a product list for my tag, head on over to the Simon Says Stamp Monday Challenge Blog and enjoy!

Sunday, October 12, 2014

My Other Creations: Decorative Folio

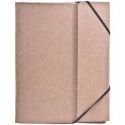
Our theme this week at the Simon Says Stamp Monday Challenge Blog is, "O is for...."  I went with O is for Organization by spiffing up this cool ready-made Collection Folio by Tim Holtz.


I started by making a paper collage to cover the front flap.  I used paper from Prima's "Free Spirit" collection, but it was a bit too bold for the look I was wanting.  I did a light wash of watered-down Gesso over the top to tone it down and smeared on some Distress Ink here and there.  I then stamped some black flowers on it from Paper Artsy to tie in the black elastic the keeps the folio shut.


But the flowers stood out way more than I expected, even after I smudged them with water.  Whoopsie!  No problem.  I fussy cut some of those cloud/puff shapes from my extra patterned paper and used them, along with a fabric scrap, to hide some of that excessive black.  I also added a Tim Holtz ruler to the spine and covered the fold-over flap with paper from Prima's "Epiphany" collection (LOVE IT).


I stamped some other images and sentiments on and the last step was to add a profound title like, "Important Stuff," which I made with fabric scraps, Tim Holtz Alpha Tiles and Tim Holtz Label Letters.


If you're going to be organized, you might as well do it in style, I suppose!  Here are the supplies I used on my folio, which you can find at Simon Says Stamp:


Oh how will you use the letter O this week?  Can't wait to see!  And remember that when you upload your fab creations to the Simon Says stamp Monday Challenge Blog, you will be automatically entered for the $50 voucher to the Simon Says Stamp store!
http://www.simonsaysstamp.com/